本文最后更新于 2025年5月18日 下午
flask+vue前后端分离学习
预期效果:使用flask+vue实现前后端分离
零基础速学
一周完成小组任务
Ok just do it
最终:实际5天多一点完成,感谢大佬发出来的建议CA的web端的参考
由于vue中有大量html语言,可能导致阅读混乱,有想要这个记录的md文件的可以私我
目前参考文章
neverlesslai/SimpleCAWEB: 简易CA系统的WEB端
大型实验周的作品,实现了一个包含X.509证书的申请,审核,撤销等功能的简单CA系统
【2024最新版】3小时学会Vue3,小白零基础视频教程,web前端快速入门实战课程_哔哩哔哩_bilibili (基本刷完)
60分钟真正搞明白Python和Flask(快速入门与进阶,不能错过的高质量教程)#python#flask_哔哩哔哩_bilibili (看到了第27min)
【Flask】快速入门后台写接口【API】【Python3】【无前端】【json格式】_哔哩哔哩_bilibili (看完了)
武沛齐老师教你 最新Flask+Vue的前后端开发快速教程(含源码)_哔哩哔哩_bilibili (没怎么看)
ES6 从入门到精通 - 邓瑞编程 (这两个是跟b站的vue3相关的)
邓瑞编程
【完结】Vue3零基础快速上手(2024最新版)_哔哩哔哩_bilibili
基本全是速通,主打一个速度:dog:
[TOC]
vue篇 npm run d
1. 基础篇与绑定
“.#mount”指向了挂载的标签
{{}}
1 2 3 4 5 6 7 8 9 10 11 12 13 14 15 16 17 18 19 20 21 22 23 24 25 26 27 28 29 30 31 32 33 34 35 36 37 38 39 40 来取值(这个符号单独放出来居然会让我的推送报错。。)vue 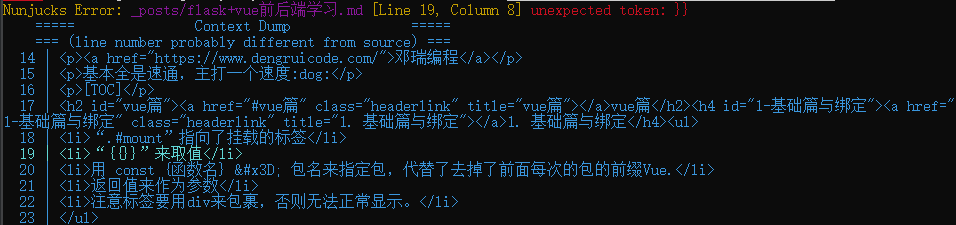 - 用 const {函数名} = 包名来指定包,代替了去掉了前面每次的包的前缀Vue. - 返回值来作为参数 - 注意标签要用div来包裹,否则无法正常显示。 ```vue <!DOCTYPE html > <html lang ="en" > <head > <meta charset ="UTF-8" > <meta name ="viewport" content ="width=device-width, initial-scale=1.0" > <title > Document</title > <script src ="vue.global.js" > </script > </head > <body > <div id ="app" > {{ msg }} <h2 > {{ web.name }} </h2 > <h2 > {{ web.version }} </h2 > </div > <script > const {createApp,reactive} = Vue createApp ({ setup ( const web =reactive ({ name :'vue3' , version :'3.0.0' , url :"xyyr" }) return { msg :'hello world' , web } } }).mount ('#app' ) </script > </body > </html >
2. vue3模块化开发 类似的代码,只不过包引入方式不太一样(具体有啥区别还不知道)
1 2 3 4 5 6 7 8 9 10 11 12 13 14 15 16 17 18 19 20 21 22 23 24 25 26 27 28 29 30 31 32
3. ref和reactive区别
ref用于存储单个基本类型的数据,如字符、字符串、数组。需要用.value来引用更改
reactive用于存储负责数据类型,如对象或数组等。直接可以进行更改
1
2
3
4
5
6
7
8
9
10
11
12
13
14
15
16
17
18
19
20
21
22
23
24
25
26
27
28
29
30
31
32
33
34
35
36
37
38
39
40
41
<!DOCTYPE html>
4. 绑定事件与案件修饰符v-on: == @
()=>{} 是 JavaScript 中的一个简化语法,用来定义一个匿名函数。如果要引用到函数,也要作为返回值返回
v-on:click=”函数名”,pycharm里会报错,但是正常运行(v-on:可以用@来替代)
br换行符,hr分割符
可以根据自己的需求定义自己的快捷键,up代表按键弹起时,down代表按下时
1
2
3
4
5
6
7
8
9
10
11
12
13
14
15
16
17
18
19
20
21
22
23
24
25
26
27
28
29
30
31
32
33
34
35
36
37
38
39
40
41
42
43
44
45
46
47
48
49
50
51
52
53
54
55
5. 显示和隐藏v-show(频繁用v-show,不频繁可以用v-if) 1 2 3 4 5 6 7 8 9 10 11 12 13 14 15 16 17 18 19 20 21 22 23 24 25 26 27 28 29 30 31 32 33 <!DOCTYPE html>
6.v-if条件判断 1 2 3 <p v-if="web.user <1000">新网站</p>
7.动态属性绑定v-bind:vulue == :value
v-bind:vulue == :value
1 2 3 4 5 6 7 8 9 10 11 12 13 14 15 16 17 18 19 20 21 22 23 24 25 26 27 28 29 30 31 32 33 34 35 36 37 38 39 40 41 42 43 44 45 46 47 <!DOCTYPE html>
8. 遍历数组或对象v-for
1 2 3 4 5 6 7 8 9 10 11 12 13 14 15 16 17 18 19 20 21 22 23 24 25 26 27 28 29 30 31 32 33 34 35 36 37 38 39 40 41 42 43 44 45 46 47 48 49 50 51 52 53 54 55 56 57 58 59 60 61 62 63 <!DOCTYPE html>
9. 双向数据绑定 v-model(这是实时渲染的)
v-on是单项非动态绑定,数据更新但是视图不更新。
v-mode双向数据绑定。
本篇有单选框,复选框,下拉框以及对应的数据绑定
1 2 3 4 5 6 7 8 9 10 11 12 13 14 15 16 17 18 19 20 21 22 23 24 25 26 27 28 29 30 31 32 33 34 35 36 37 38 39 40 41 42 43 44 45 46 47 48 49 50 51 52 53 54 55 56 57 58 <!DOCTYPE html>
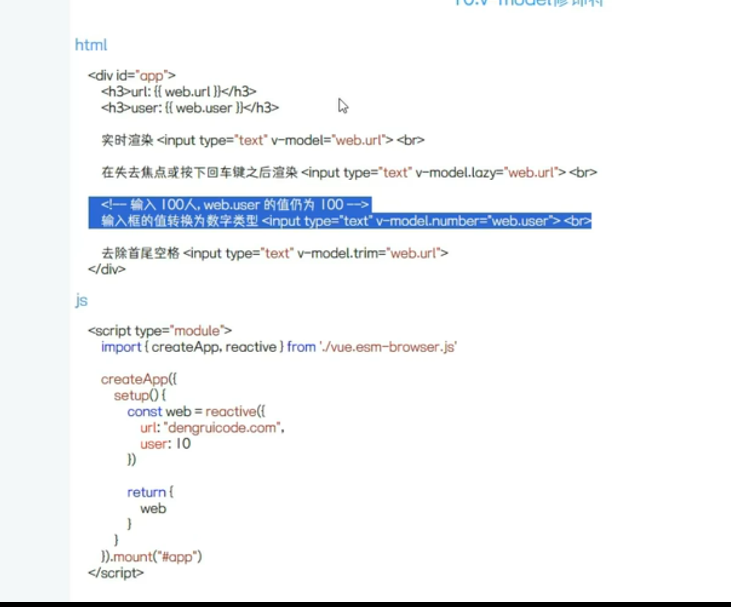
10. v-model修饰符
感觉这次用不到,先截了个图,没跟着敲
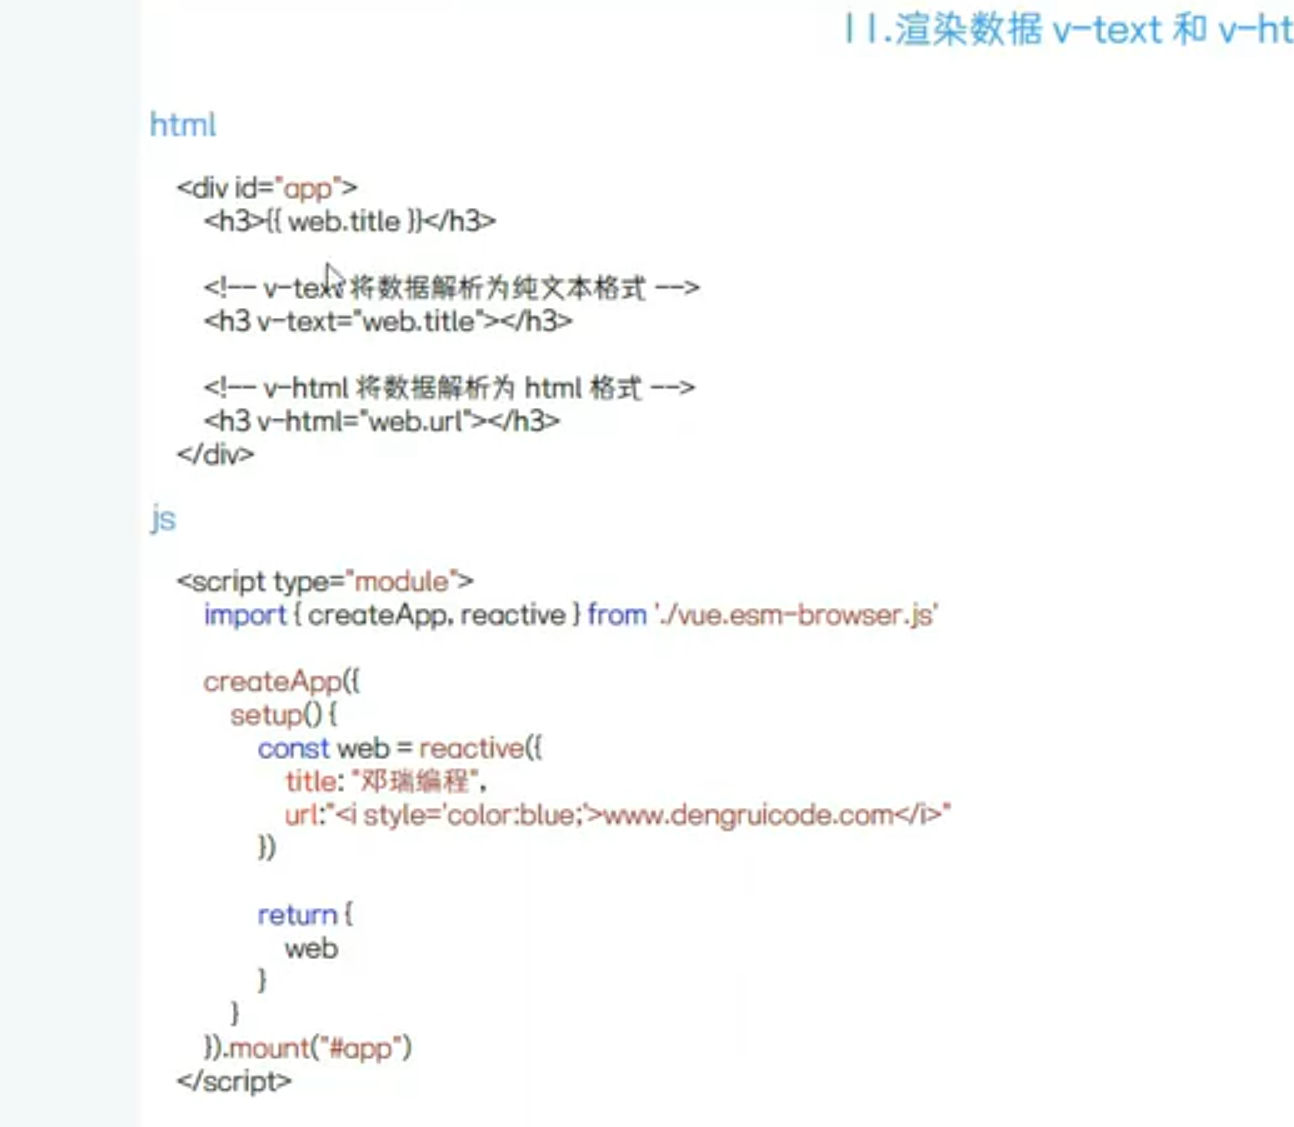
11. v-text 与v-html(text相当于直接的文本,html会解析对应的标签属性,如大小、颜色等)
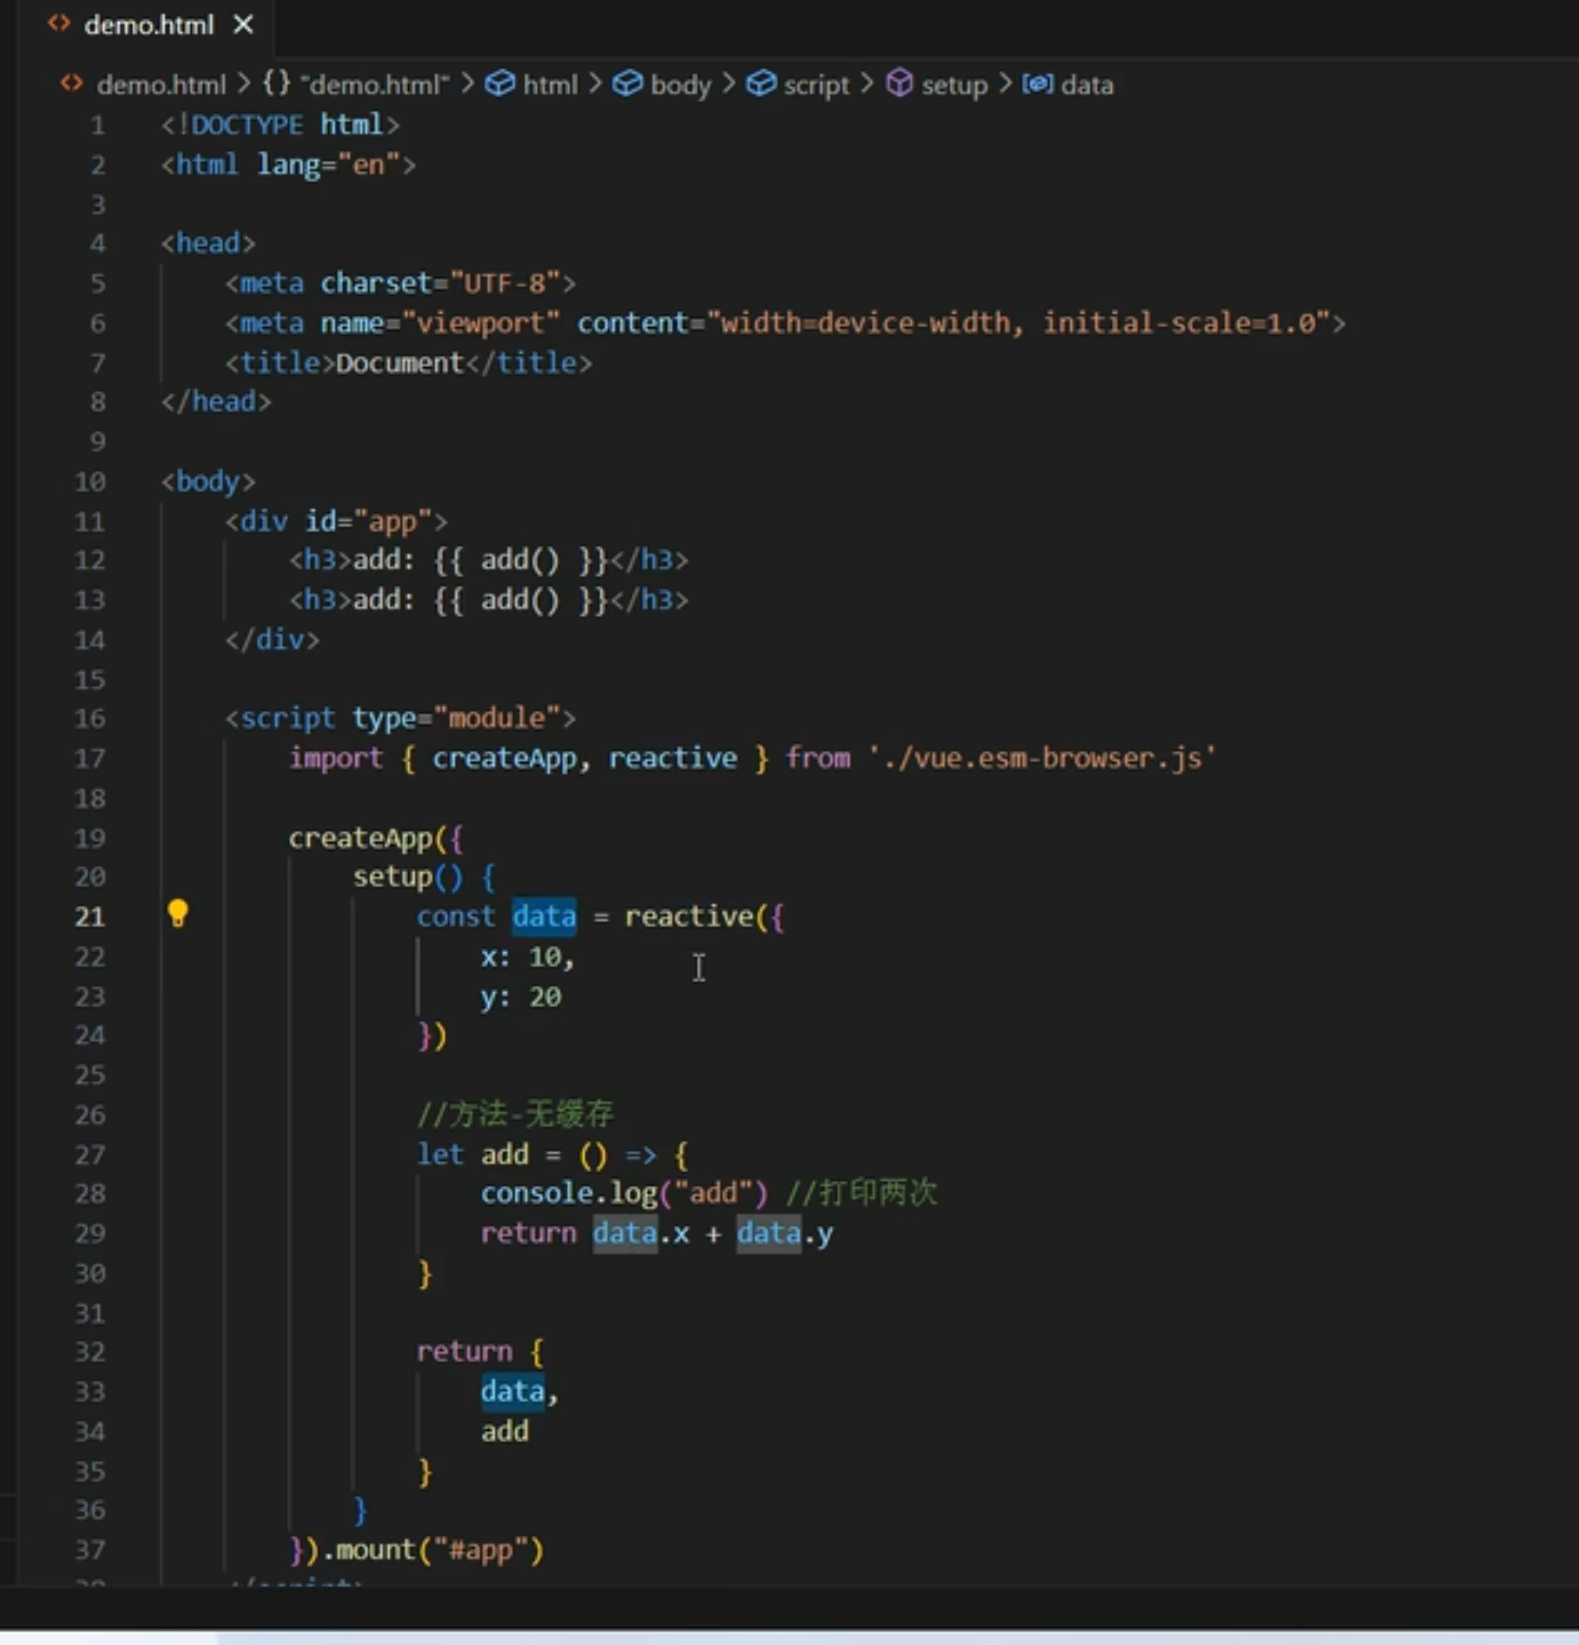
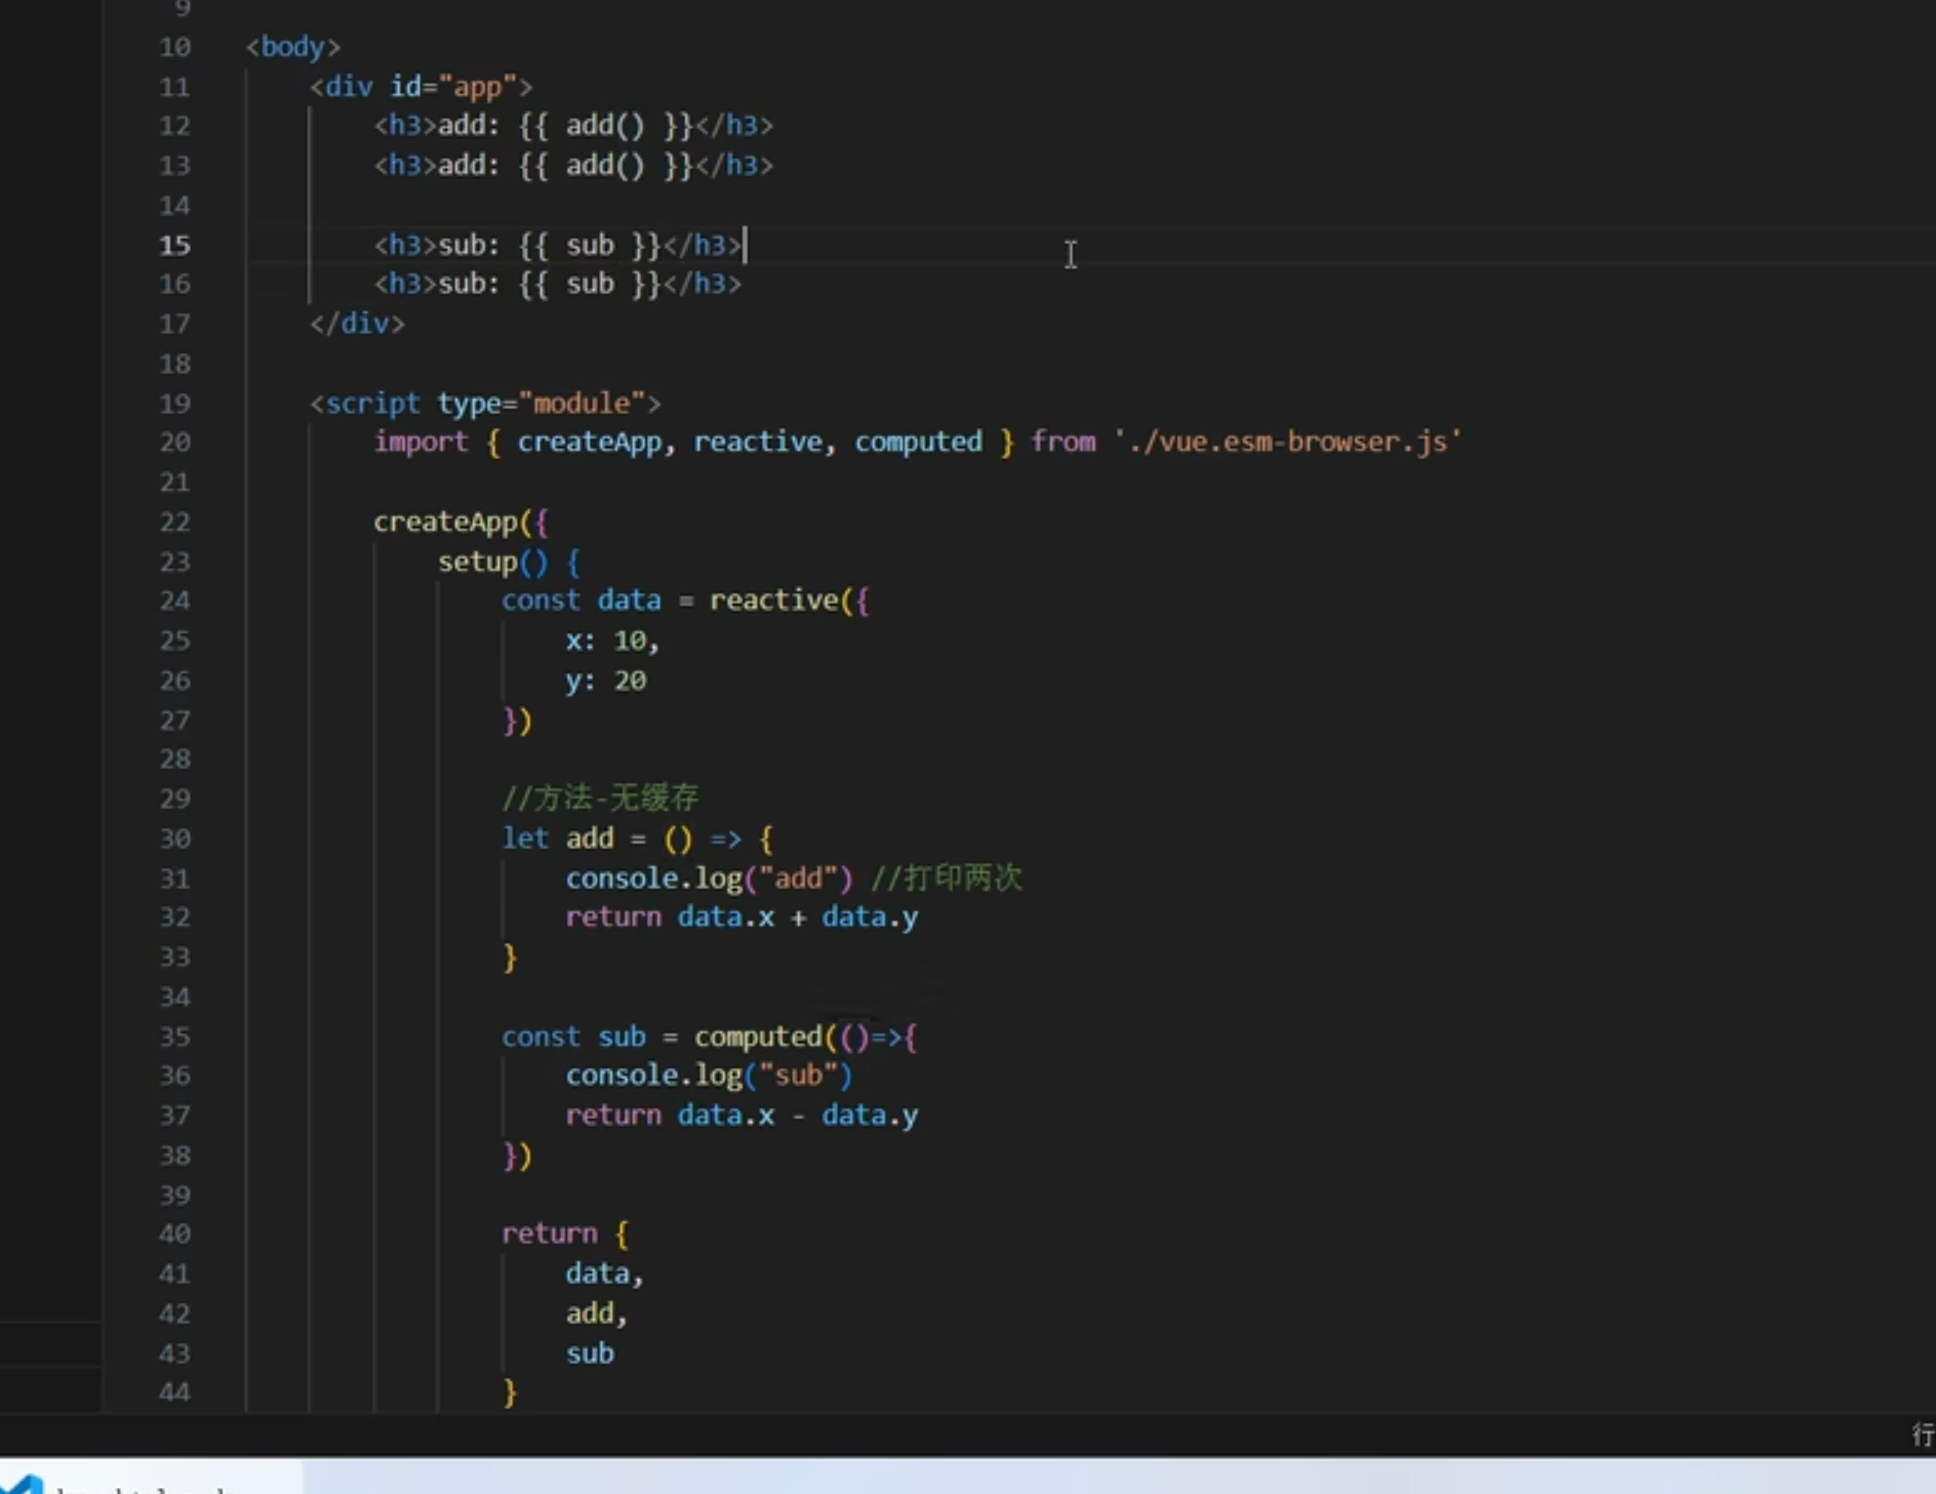
12. 计算属性computed(计算属性有缓存,只有发生数据改变时才会调用一次)
13. 侦听器watch(手动监听)
conselve.log可以在控制台打印值(可以根据选择来做判断)
这里数组与对象都是引用传递,修改值后会真修改。
还没手敲,复制的作者的。(别问我为什么之前是截图)
1 2 3 4 5 6 7 8 9 10 11 12 13 14 15 16 17 18 19 20 21 22 23 24 25 26 27 28 29 30 31 32 33 34 35 36 37 38 39 40 41 42 43 44 45 46 47 48 49 50 51 52 53 54 55 56 57 58 59 60 61 62 63 64 65 66 67 68 69 70 71 72 73 74 75 76 77 78 79 80 81 82 83 html
14. 自动监听watcheffect 1 2 3 4 5 6 7 8 9 10 11 12 13 14 15 16 17 18 19 20 21 22 23 24 25 26 27 28 29 30 31 32 33 34 35 36 37 38 39 40 41 42 43 44 45 46 47 48 49 50 51 52 53 54 55 56 57 58 59 60 61 62 63 64 65 66 67 68 69 70 html
15.图片轮播 1 2 3 4 5 6 7 8 9 10 11 12 13 14 15 16 17 18 19 20 21 22 23 24 25 26 27 28 29 30 31 32 33 34 35 36 37 38 39 40 41 42 43 44 45 46 47 48 49 50 51 52 53 54 55 56 57 58 59 60 61 62 63 64 65 66 67 <!DOCTYPE html>
16.记事本案例 1 2 3 4 5 6 7 8 9 10 11 12 13 14 15 16 17 18 19 20 21 22 23 24 25 26 27 28 29 30 31 32 33 34 35 36 37 38 39 40 41 42 43 44 45 46 47 48 49 50 51 52 53 54 55 56 57 58 59 60 61 62 63 64 65 66 67 68 <!DOCTYPE html>
17.购物车案例及优化 1 2 3 4 5 6 7 8 9 10 11 12 13 14 15 16 17 18 19 20 21 22 23 24 25 26 27 28 29 30 31 32 33 34 35 36 37 38 39 40 41 42 43 44 45 46 47 48 49 50 51 52 53 54 55 56 57 58 59 60 61 62 63 64 65 66 67 68 69 70 71 72 73 74 75 76 77 78 79 80 81 82 83 84 85 86 87 88 89 90 91 92 93 94 95 96 97 98 99 100 101 102 103 104 105 106 107 108 109 110 111 112 113 114 115 116 117 118 119 120 121 122 123 124 125 126 127 128 129 130 131 132 133 134 135 136 137 138 139 140 141 142 143 144 145 146 147 148 149 150 151 152 153 154 155 156 157 158 159 160 161 162 163 164 165 166 167 <!DOCTYPE html > <html lang ="en" > <head > <meta charset ="UTF-8" > <title > Title</title > <style > table { width : 600px ; color : #8f8e8e ; text-align : center; border-collapse : collapse; } table thead { background : #F5F5F5 ; } table tr { height : 30px ; line-height : 30px ; border : 1px solid #ececec ; } </style > </head > <body > <div id ="app" > <table > <thead > <tr > <td > <input type ="checkbox" v-model ="data.selected" @change ="selectAll" /> </td > <td > 商品</td > <td > 单价</td > <td > 库存</td > <td colspan ="2" > 操作</td > </tr > </thead > <tbody > <tr v-for ="(value, index) in data.list" > <td > <input type ="checkbox" v-model ="data.checkboxList" :value ="value" @change ="checkSelect" /> </td > <td > {{ value.name }}</td > <td > {{ value.price }}</td > <td > {{ value.stock }}</td > <td > <button @click ="sub(value)" > -</button > <button @click ="add(value)" > +</button > </td > <td > <button @click ="del(index,value.id)" > 删除</button > </td > </tr > </tbody > <tfoot > <tr > <td > 总价 {{ totalPrice() }}</td > </tr > </tfoot > </table > </div > <script type ="module" > import { createApp, reactive } from './vue.esm-browser.js' createApp ({ setup ( const data = reactive ({ selected : false , checkboxList : [], list : [{ id : 1 , name : "铅笔" , price : 10 , number : 1 , stock : 3 }, { id : 2 , name : "鼠标" , price : 20 , number : 2 , stock : 5 }, { id : 3 , name : "键盘" , price : 30 , number : 1 , stock : 6 }], }) const sub = (value ) => { value.number -- if (value.number <= 1 ) { value.number = 1 } } const add = (value ) => { value.number ++ if (value.number >= value.stock ) { value.number = value.stock } } const del = (index, id ) => { data.list .splice (index, 1 ) let newArr = data.checkboxList .filter ((value, index ) => { return value.id != id }) data.checkboxList = newArr checkSelect () } const totalPrice = ( let total = 0 for (let i = 0 ; i < data.checkboxList .length ; i++) { total += data.checkboxList [i].price * data.checkboxList [i].number } return total } const selectAll = ( if (data.selected ) { data.checkboxList = data.list } else { data.checkboxList = [] } } const checkSelect = ( if (data.checkboxList .length != data.list .length || data.list .length == 0 ) { data.selected = false } else { data.selected = true } } return { data, sub, add, del, totalPrice, selectAll, checkSelect } } }).mount ("#app" ) </script > </body > </html >
1 2 3 4 5 6 7 8 9 10 11 12 13 14 15 16 17 18 19 20 21 22 23 24 25 26 27 28 29 30 31 32 33 34 35 36 37 38 39 40 41 42 43 44 45 46 47 48 49 50 51 52 53 54 55 56 57 58 59 60 61 62 63 64 65 66 67 68 69 70 71 72 73 74 75 76 77 78 79 80 81 82 83 84 85 86 87 88 89 90 91 92 93 94 95 96 97 98 99 100 101 102 103 104 105 106 107 108 109 110 111 112 113 114 115 116 117 118 119 120 121 122 123 124 125 126 127 128 129 130 131 132 133 134 135 136 137 138 139 140 141 142 143 144 145 146 147 148 149 150 151 152 153 154 155 156 157 158 159 160 161 162 163 164 165 166 167 168 169 170 171 172 173 174 175 176 177 178 179 180 181 182 183 184 185 186 187 188 189 190 191 192 193 194 195 196 197 198 199 200 201 202 203 204 205 206 207 208 209 210 211 212 213 214 215 216 217 <!DOCTYPE html > <html lang ="en" > <head > <meta charset ="UTF-8" > <title > Title</title > <style > table { width : 600px ; color : #8f8e8e ; text-align : center; border-collapse : collapse; } table thead { background : #F5F5F5 ; } table tr { height : 30px ; line-height : 30px ; border : 1px solid #ececec ; } </style > </head > <body > <div id ="app" > <table > <thead > <tr > <td > <input type ="checkbox" v-model ="data.selected" /> </td > <td > 商品</td > <td > 单价</td > <td > 库存</td > <td colspan ="2" > 操作</td > </tr > </thead > <tbody > <tr v-for ="(value, index) in data.list" > <td > <input type ="checkbox" v-model ="data.checkboxList" :value ="value" /> </td > <td > {{ value.name }}</td > <td > {{ value.price }}</td > <td > {{ value.stock }}</td > <td > <button @click ="sub(value)" > -</button > <button @click ="add(value)" > +</button > </td > <td > <button @click ="del(index,value.id)" > 删除</button > </td > </tr > </tbody > <tfoot > <tr > <td > 总价 {{ totalPrice }}</td > </tr > </tfoot > </table > </div > <script type ="module" > import { createApp, reactive, watch, computed } from './vue.esm-browser.js' createApp ({ setup ( const data = reactive ({ selected : false , checkboxList : [], list : [{ id : 1 , name : "铅笔" , price : 10 , number : 1 , stock : 3 }, { id : 2 , name : "鼠标" , price : 20 , number : 2 , stock : 5 }, { id : 3 , name : "键盘" , price : 30 , number : 1 , stock : 6 }], }) const sub = (value ) => { value.number -- if (value.number <= 1 ) { value.number = 1 } } const add = (value ) => { value.number ++ if (value.number >= value.stock ) { value.number = value.stock } } const del = (index, id ) => { data.list .splice (index, 1 ) let newArr = data.checkboxList .filter ((value, index ) => { return value.id != id }) data.checkboxList = newArr } const totalPrice = computed (() => { return data.checkboxList .reduce ((total, item ) => total + item.price * item.number , 0 ) }) let flag = true watch (() => data.selected , (newValue, oldValue ) => { if (newValue) { data.checkboxList = data.list } else { if (flag) { data.checkboxList = [] } } }) watch (() => data.checkboxList , (newValue, oldValue ) => { console .log ("newValue:" , newValue, "oldValue:" , oldValue) console .log (newValue.length ) if (newValue.length == data.list .length && data.list .length != 0 ) { data.selected = true flag = true } else { data.selected = false flag = false } }) return { data, sub, add, del, totalPrice, } } }).mount ("#app" ) </script > </body > </html >
18.axios实现文章搜索 1 2 3 4 5 6 7 8 9 10 11 12 13 14 15 16 17 18 19 20 21 22 23 24 25 26 27 28 29 30 31 32 33 34 35 36 37 38 39 40 41 42 43 44 45 46 47 48 49 50 51 52 53 54 55 56 57 58 59 60 61 62 63 64 65 66 67 68 69 70 71 72 73 74 75 76 77 78 79 80 81 82 83 84 85 86 87 88 89 <!DOCTYPE html>
flask篇 基础知识
路由、变量及url规则,模板,静态文件
重定向和错误
requirements.txt
flask
1 pip3 install -r requirements.txt
第一个例子,app.py(基础启动) 1 2 3 4 5 6 7 8 9 10 from flask import Flask@app.route('/' def index ():return 'Hello, World!' if __name__ == '__main__' :True )
其他地方调用,名字是app,自己调用,名字是main
关于@以及root的作用(来自gpt的解释):
@的作用
在 Python 中,@ 语法用于装饰器 (decorator),它是一种函数修饰工具。
装饰器的作用是在函数或方法的执行之前或之后,动态地添加功能 。@decorator_name 的语法等价于手动调用:
1 2 3 4 python 复制代码def index ():return 'Hello, World!' index = decorator_name(index )
在你的代码中,@app.route('/') 是一个装饰器,它的作用是将一个 URL 路径绑定到一个函数上。也就是说,当用户访问特定路径(如/)时,Flask 会调用对应的函数并返回其结果。
route的作用
2.1. app.route('/')
route 是 Flask 提供的一个方法,常与装饰器配合使用。它的作用是定义路由 ,即指定当访问某个 URL 时,该由哪个函数处理请求。
2.2. 使用说明
/ 是 URL 的路径,表示根路径(主页)。装饰的函数 index() 是处理请求的视图函数,它返回的内容会作为 HTTP 响应的内容。
例如:
当用户在浏览器中访问 http://127.0.0.1:5000/ 时,Flask 会执行 index() 函数,并将返回的字符串 'Hello, World!' 显示在页面上。
第二个例子,app1.py(变量类型的定义)
通过路由索引,注意,如果在路径中作为参数时,route内变量的形式为要加<>
url标准写法后侧带/,就算访问访问时少加/也能正常访问(少加的话如果访问,会自动补全),反之就不可
1 2 3 4 5 6 7 8 9 10 11 12 13 14 15 from flask import Flask@app.route('//' def index ():return 'Hello, World!' @app.route('/<name>/' def name (name ):return 'Hello, %s!' % name@app.route('/ids/<int:id>/' def ids (id return 'ID: %d' % id if __name__ == '__main__' :'127.0.0.1' , port=5000 , debug=True , threaded=True )
第三个例子app2.py、index2.html
1 2 3 4 5 6 7 8 9 10 11 12 13 14 15 from flask import Flask, render_template'/' )'xyyr' 'name' :'xyyr' , 'age' :20}'index2.html' , my_int =t_int, my_str =t_str, my_list =t_list, my_dict =t_dict)if __name__ == '__main__' :run (debug =True )
下面时对应的html文件,包括对应的传参。
1 2 3 4 5 6 7 8 9 10 11 12 13 14 15 16 17 18 19 20 21 22 23 24 25 26 27 28 29 30 <!DOCTYPE html > <html lang ="en" > <head > <meta charset ="UTF-8" > <title > Title</title > </head > <body > <h2 > 模板</h2 > my_int : {{ my_int }} <br > my_str : {{ my_str }} <br > my_list : {{ my_list }} <br > my_dict : {{ my_dict }} <br > my_bool : {{ my_bool }} </br > <h2 > 列表数据</h2 > {{ my_list [0]}} {{ my_list [1]}} {{ my_list.2 }} <h2 > 字典数据</h2 > {{ my_dict ['name']}} {{ my_dict.ahe }} <h2 > 算数运算</h2 > {{ my_int + my_list.0 }} </body > </html >
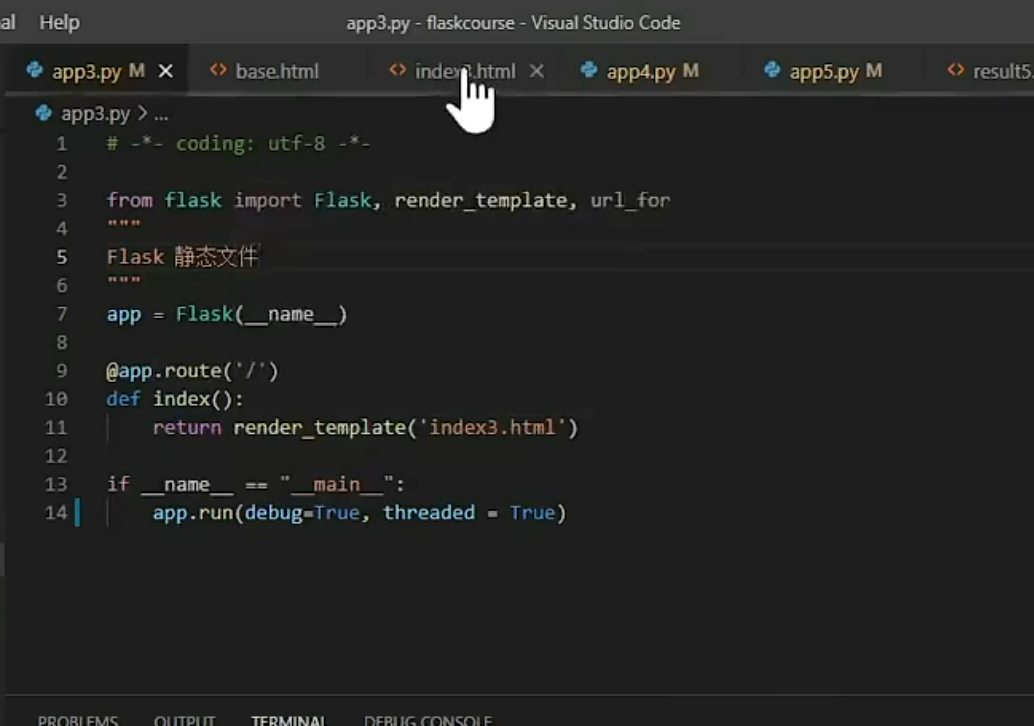
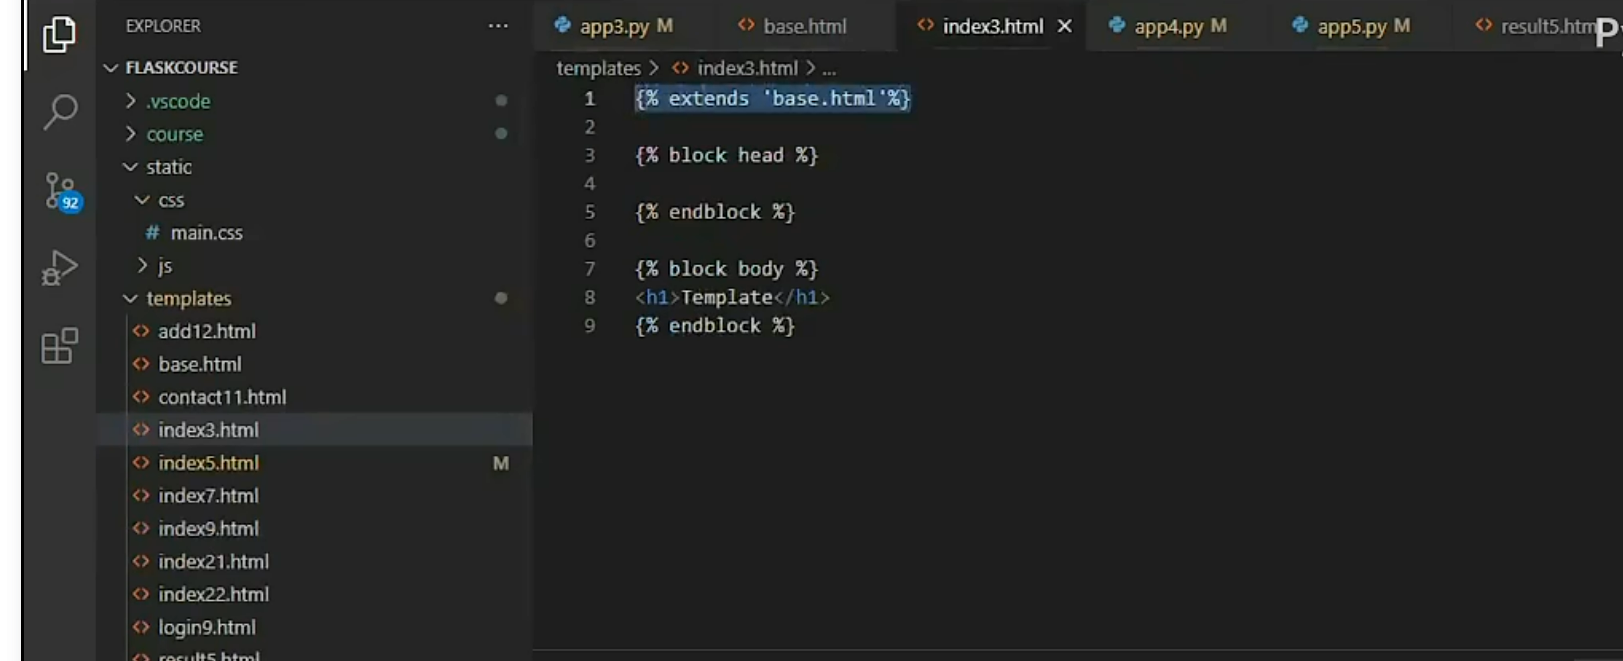
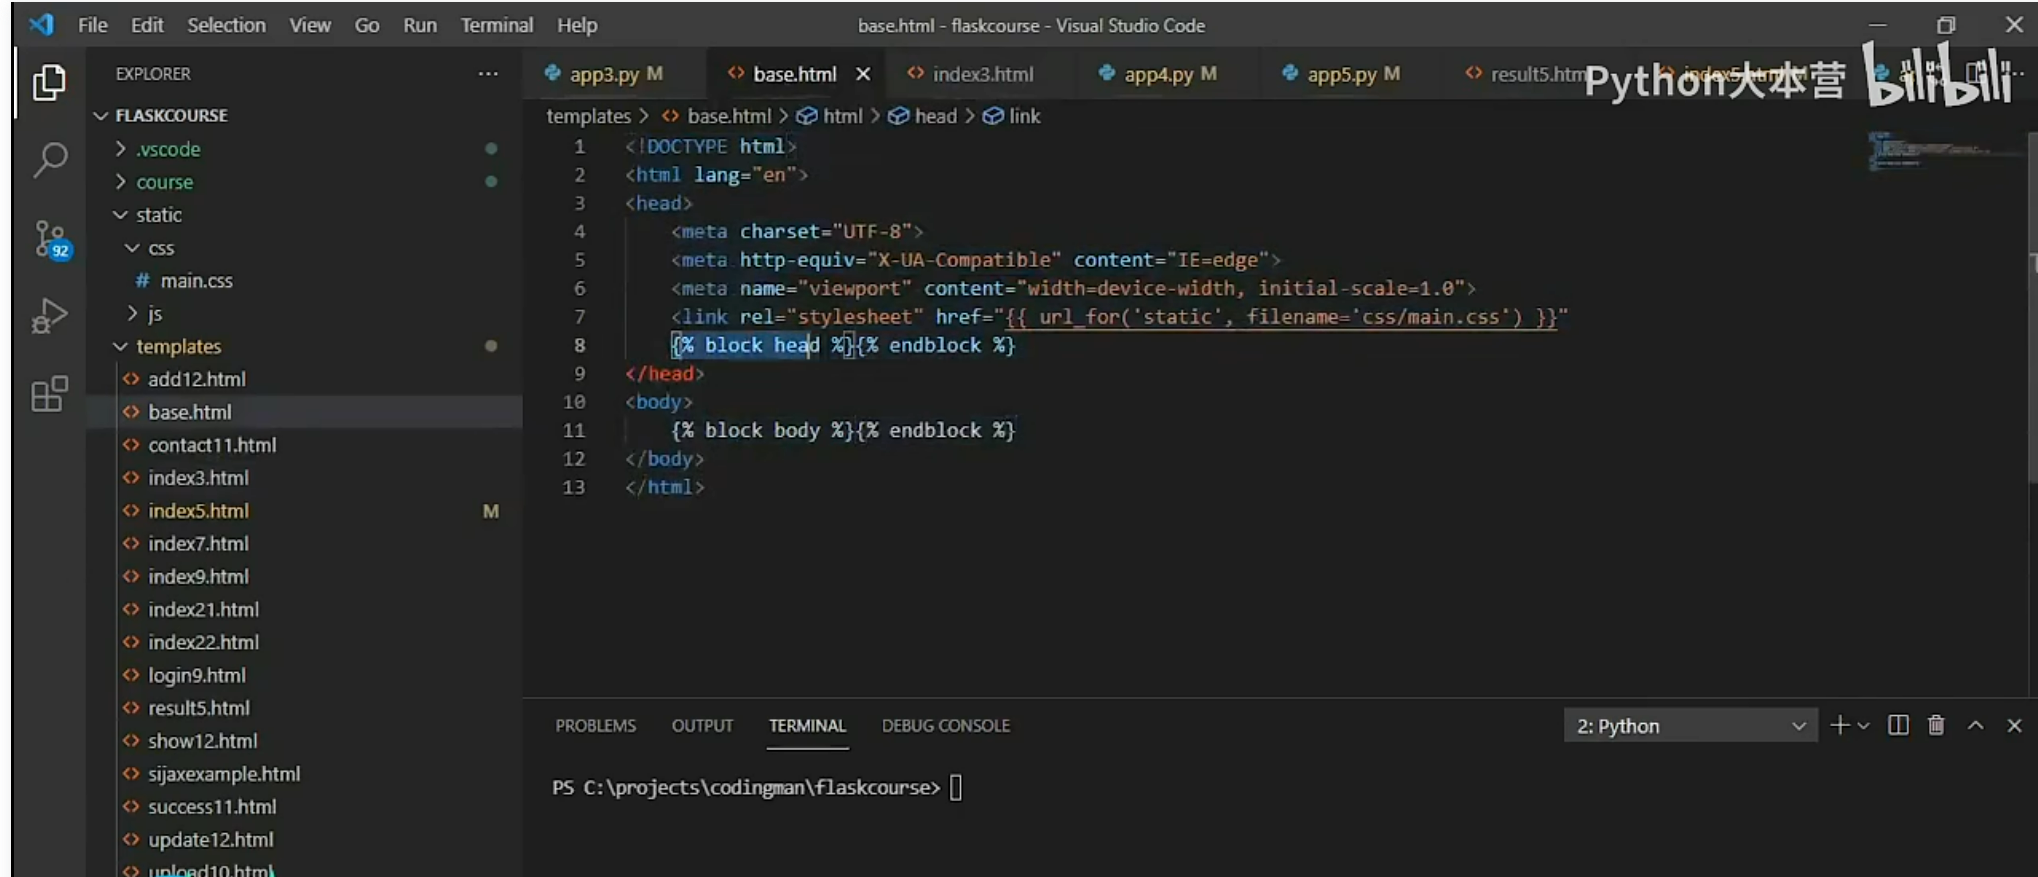
第四个例子app3.py flask静态文件
时间紧迫,先截图后补手敲的代码。
第五个例子app4.py
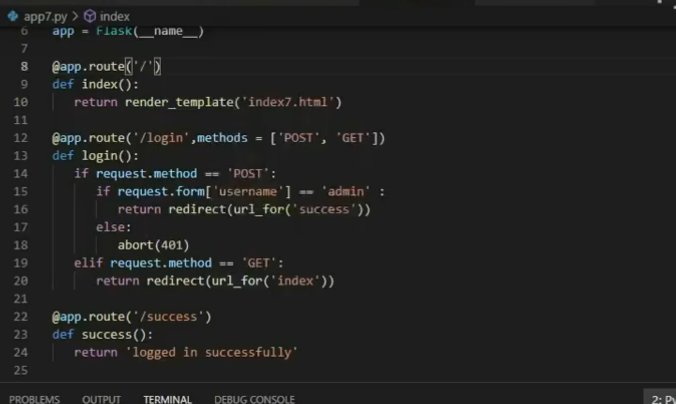
1 2 3 4 5 6 7 8 9 10 11 12 13 14 15 16 17 18 19 20 21 from flask import Flask , redirect, url_for@app.route('/' def index ():return 'Hello, World!' @app.route('/admin' def hello_admin ():return 'Hello, admin!' @app.route('/guest/<guest>' def hello_guest (guest ):return 'Hello, %s as guest!' % guest@app.route('/user/<name>' def hello_user (name ):if name == 'admin' :return redirect(url_for('hello_admin' ))else :return redirect(url_for('hello_guest' , guest=name))if __name__ == '__main__' :True )
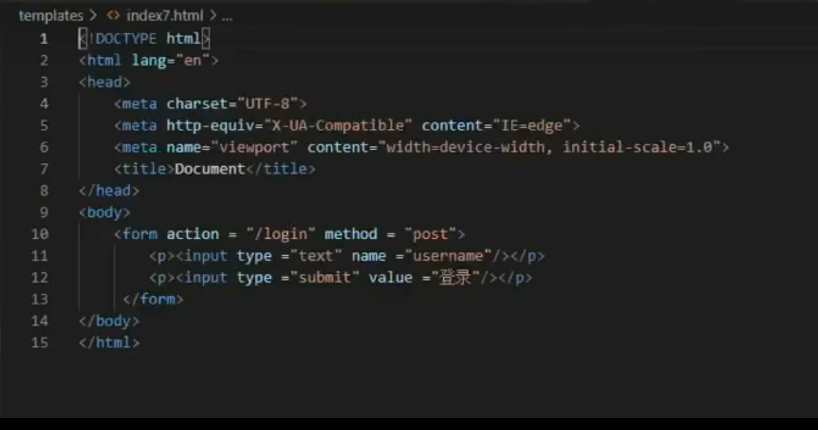
第六个例子,app5.py(封装为表格返回) 1 2 3 4 5 6 7 8 9 10 11 12 13 14 15 from flask import Flask , render_template, requestfrom werkzeug.wrappers.response import ResponseStream@app.route('/' def stufent ():return render_template('student.html' )@app.route('/result' ,methods=['POST' ,'GET' ] def result ():if request.method == 'POST' :return render_template("result.html" , result=result)if __name__ == '__main__' :True )
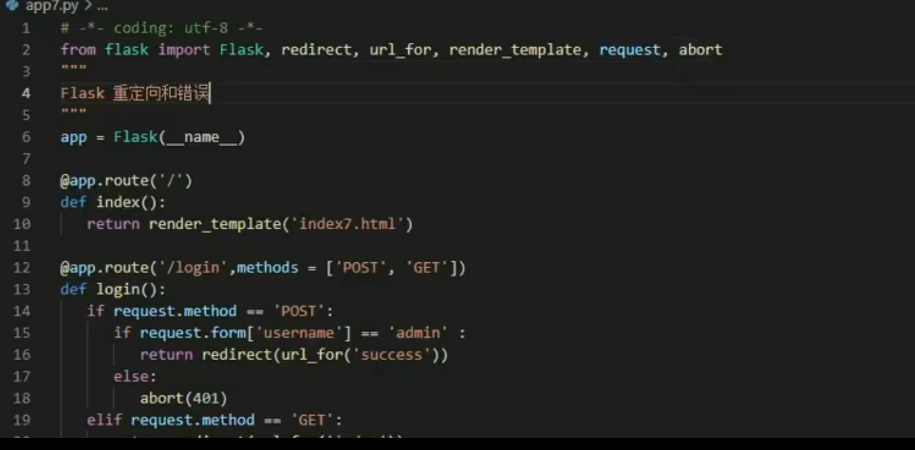
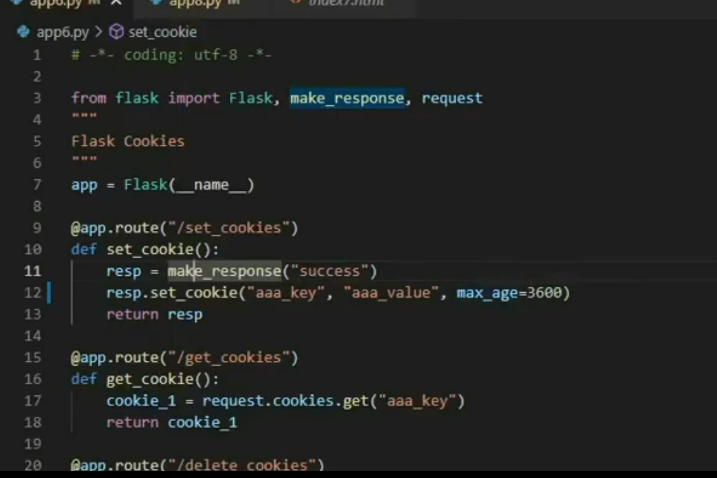
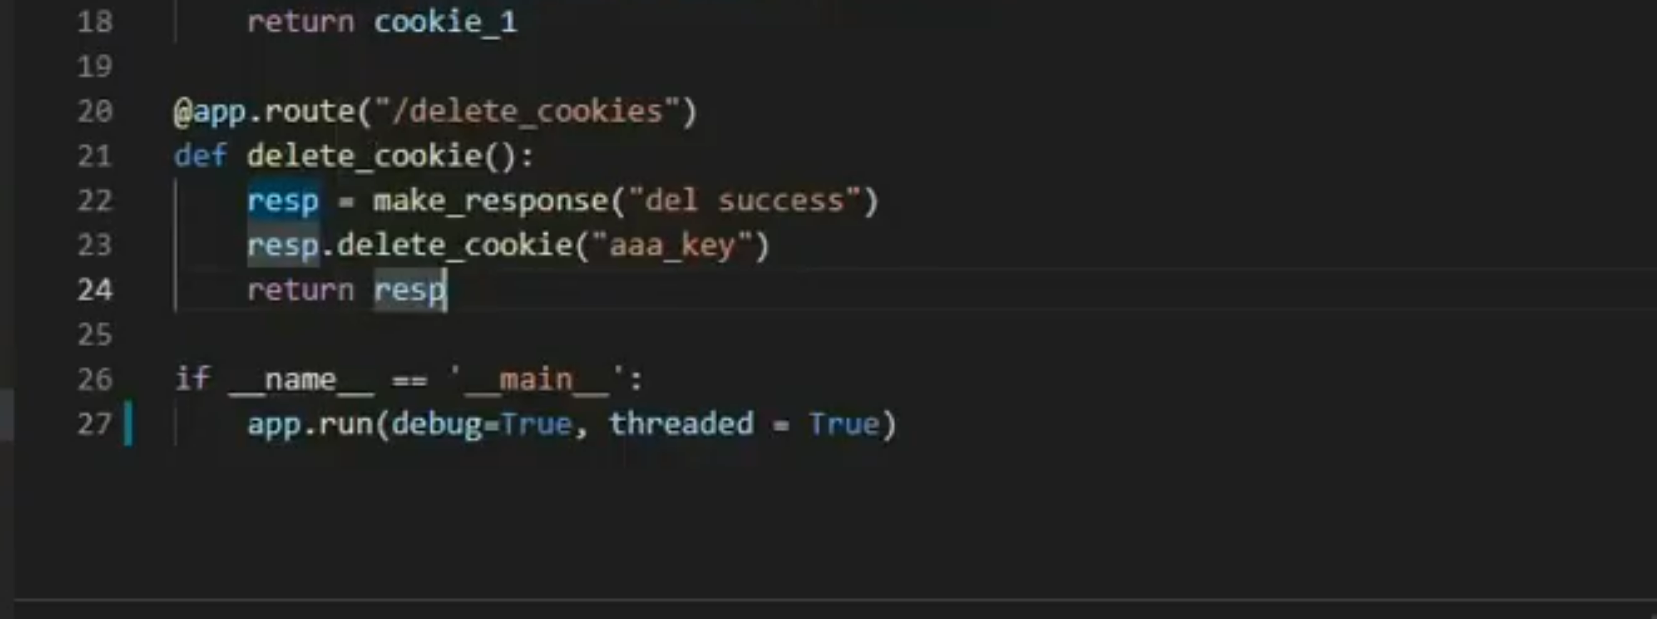
7. app6.py(url重定向与错误)
高级知识
cookies及会话
消息闪现
WTF表单
SQLAlchemy及数据库、Sjiax
1.cookie
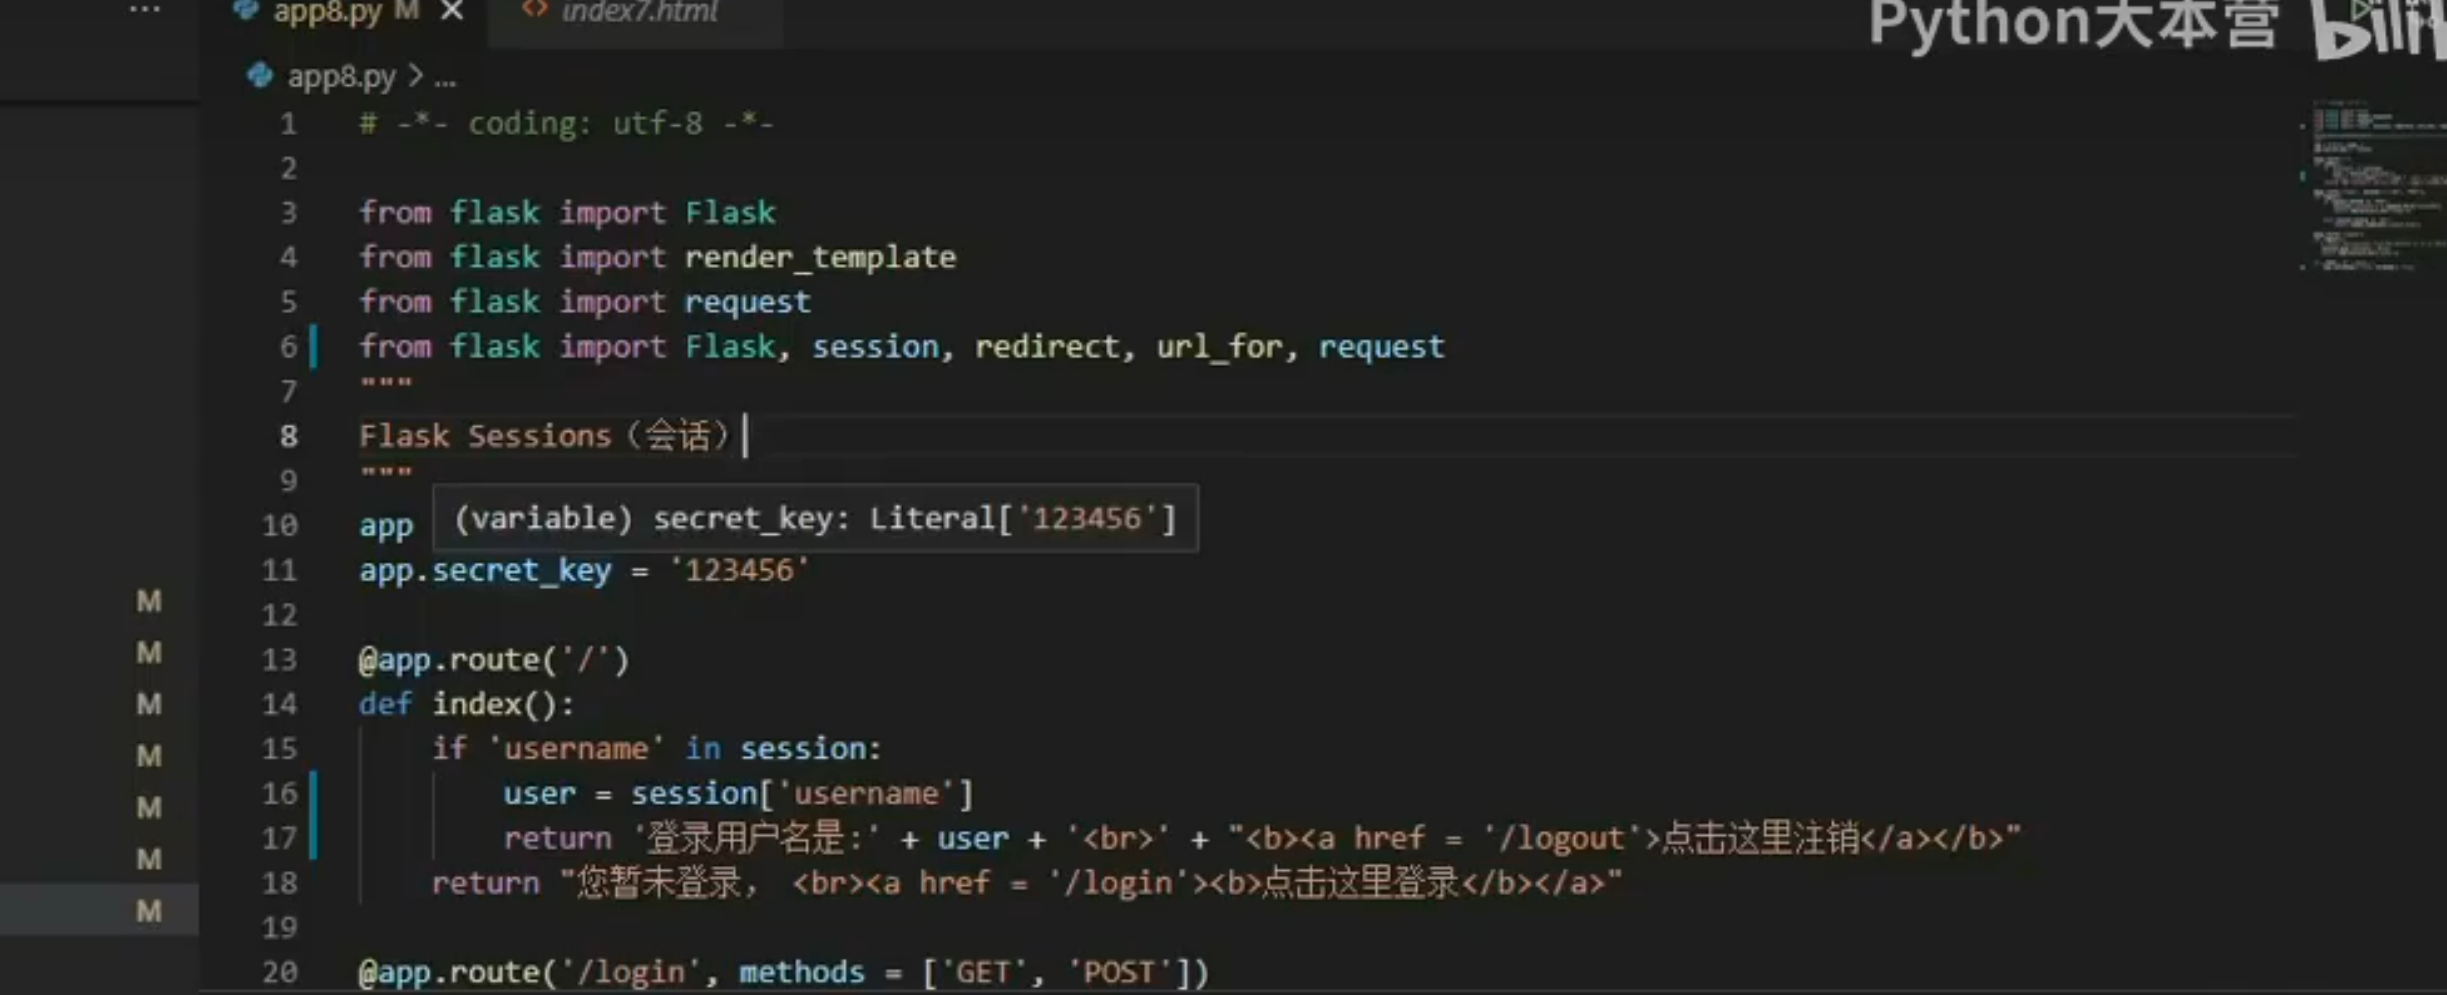
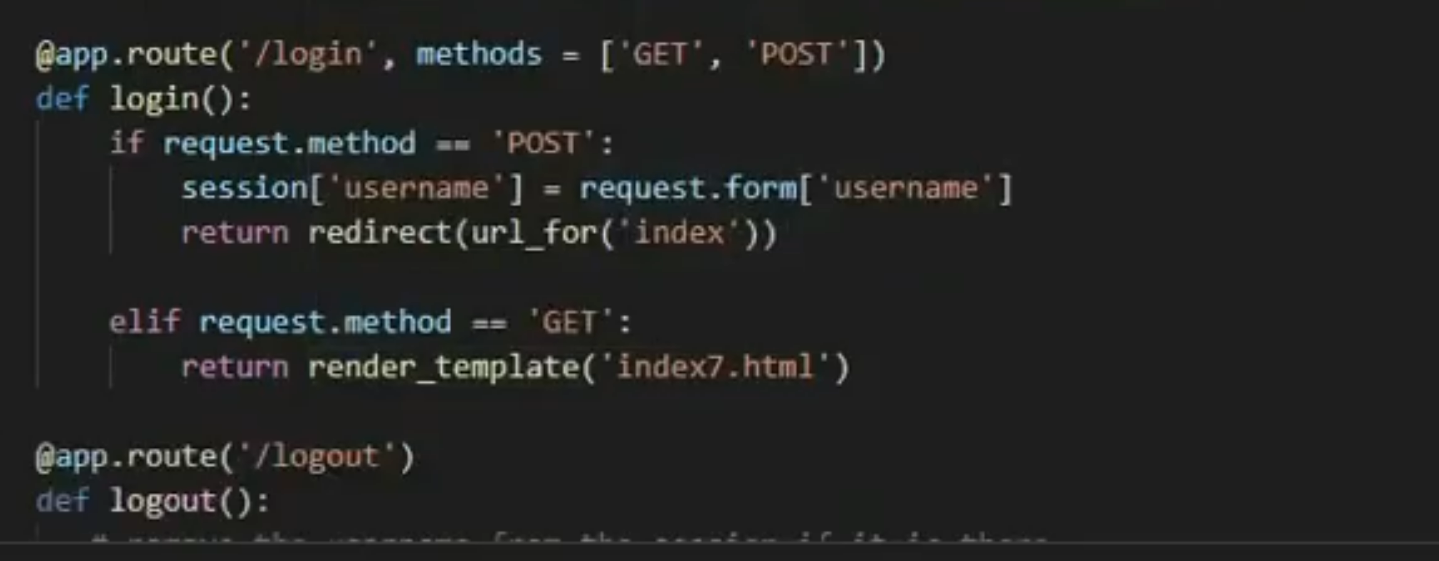
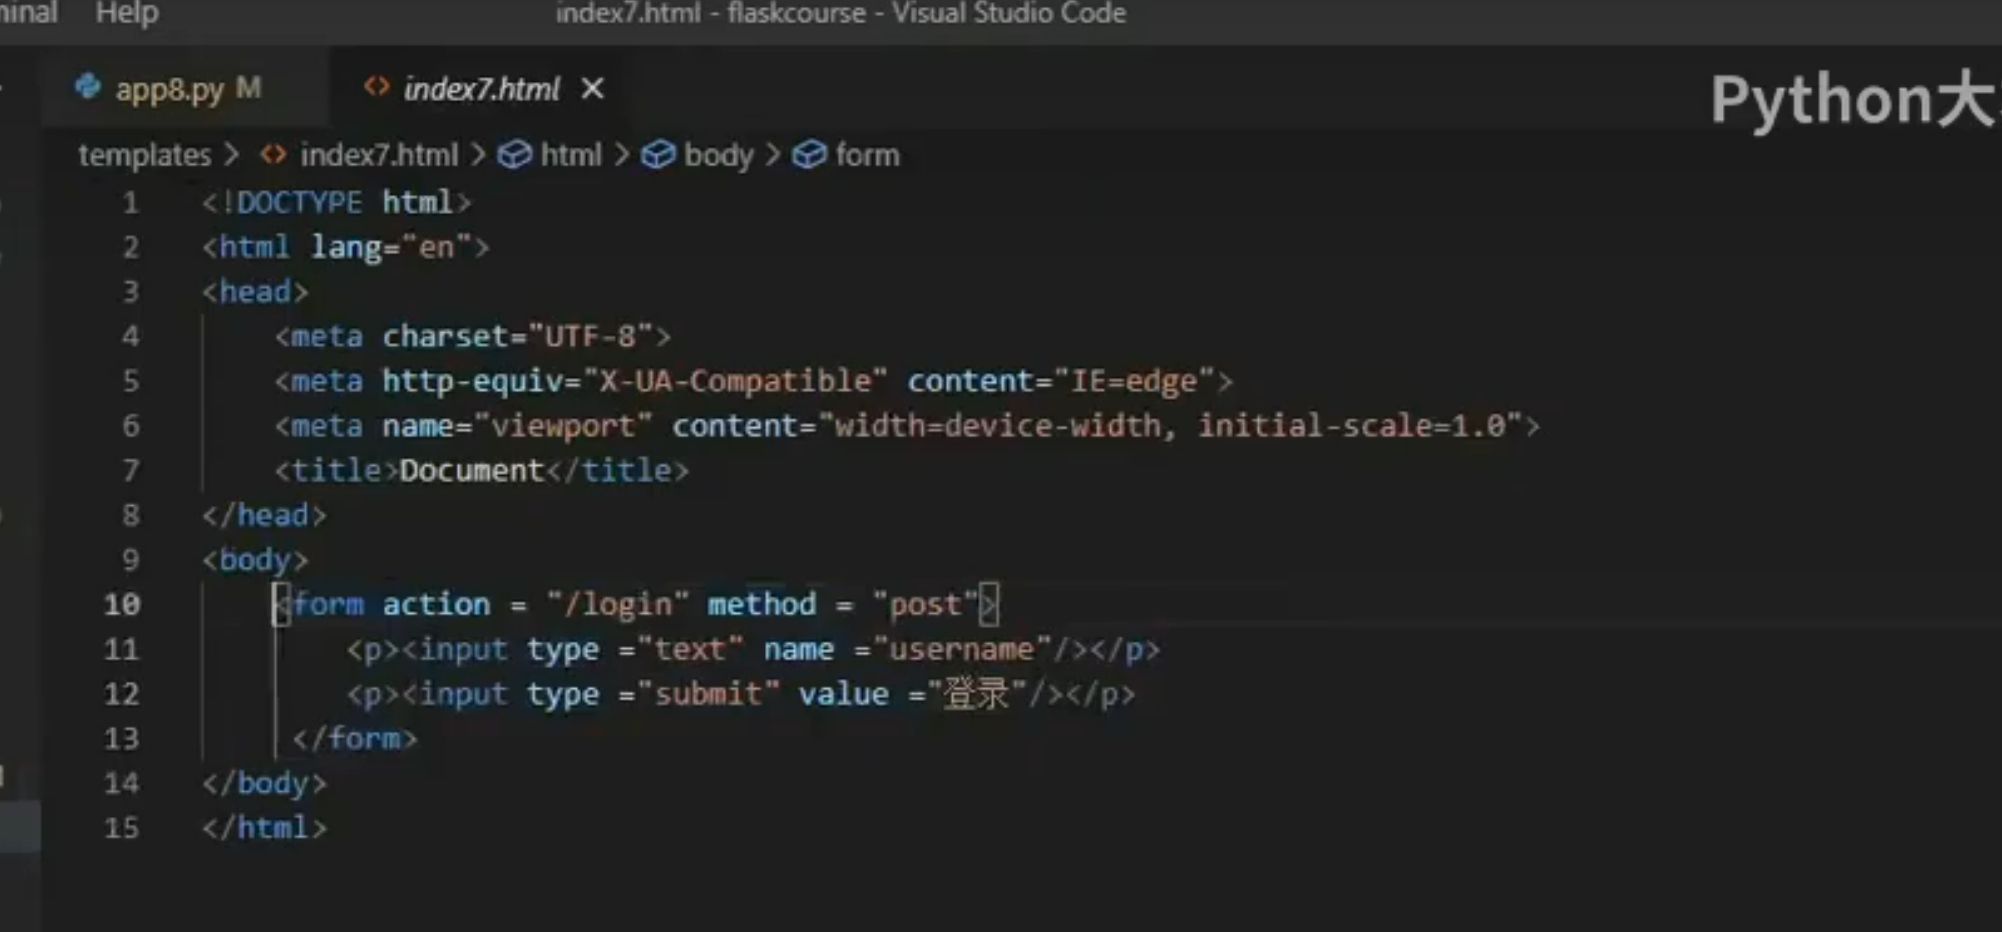
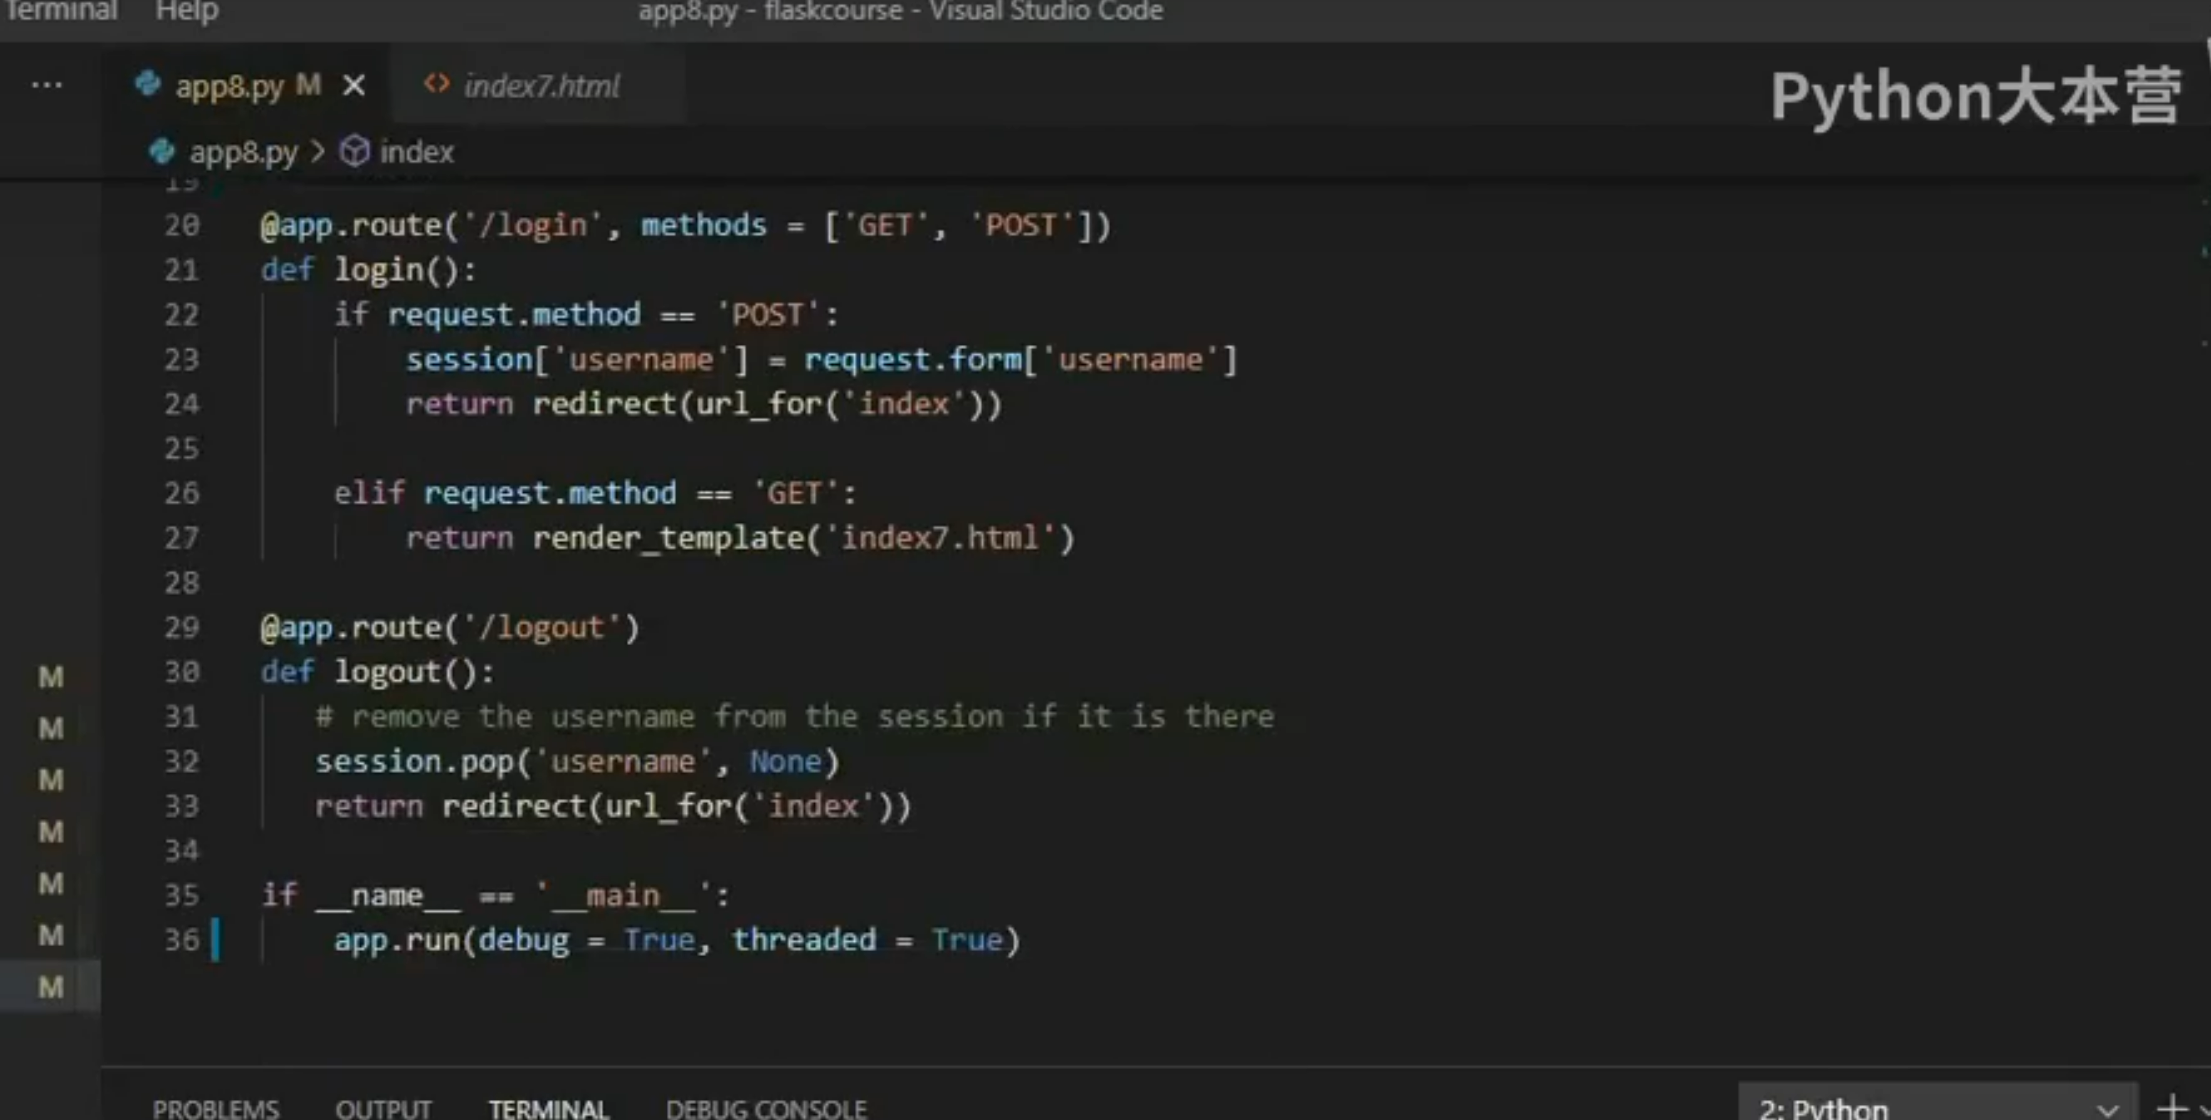
2.session会话
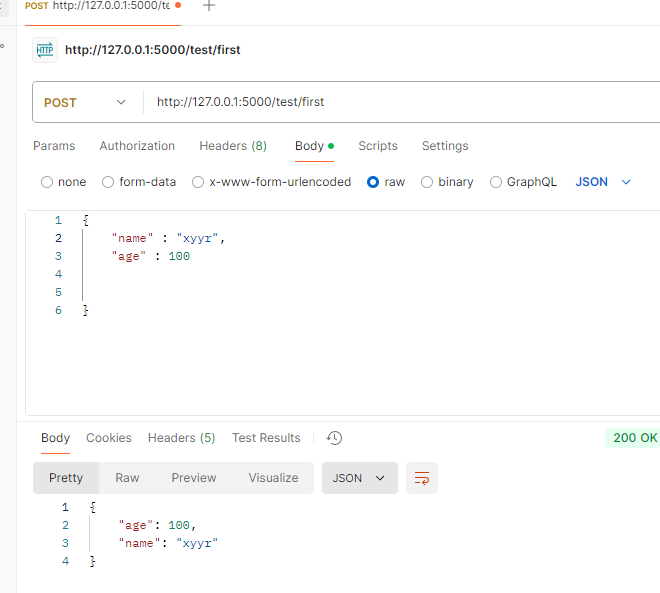
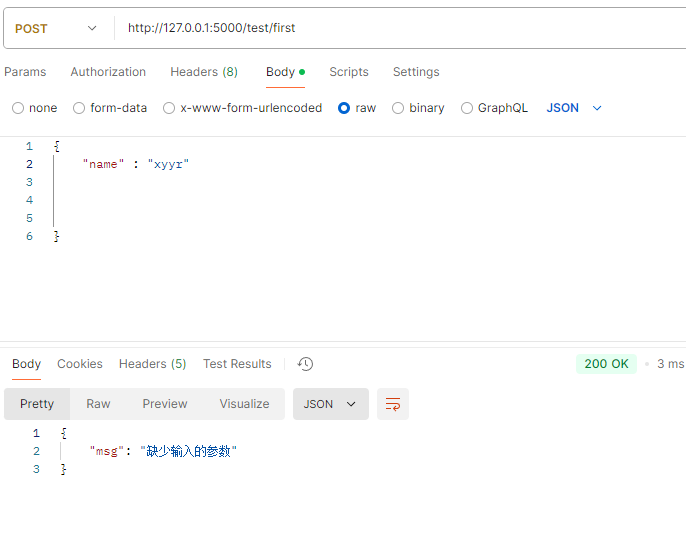
用flask写json接口
注意写json时,变量里面不要乱加空格,空格也会被当作字典中变量的一部分
代码:
1 2 3 4 5 6 7 8 9 10 11 12 13 14 15 16 17 18 19 20 21 22 23 24 25 26 27 28 29 30 from flask import Flask, request, jsonify@app.route('/' , methods=["GET" , "POST" ] def index ():return 'Hello, World!' @app.route('/test/first' , methods=["POST" ] def first_post ():try :print (my_json)"name" )"age" )if not all ([get_name, get_age]):return jsonify(msg="缺少输入的参数" )return jsonify({"name" : get_name, "age" : get_age})except Exception as e:print (e)return jsonify(msg="出错了,重新输入" )if __name__ == '__main__' :True )
实例:
写接口篇 1.初次尝试(就着几个不一样的教程混杂着试) 这里用的是post传参的搜索功能
flask代码:
1 2 3 4 5 6 7 8 9 10 11 12 13 14 @app.route('/article/postJson/search',methods=['POST'])
js代码:
1 2 3 4 5 6 7 8 9 10 11 12 13 14 15 16 17 18 19 20 21 22 23 24 25 26 27 28 29 30 31 32 33 34 35 36 37 38 39 40 41 42 43 44 45 46 47 48 49 50 51 52 53 54 55 56 57 58 59 <script type="module">
效果:后端用request接收前端传递的数据,前端用axios接收对应的数据。
前端中途遇到过的困难 刷新后定位异常的问题 路由配置的index.ts中,将路由形式改为webhash
前端用户验证问题: 用sessionStorage在登录成功时存储,登出时退出,每个功能调用前先验证会话信息。
涉及用法:
1 2 sessionStorage.setItem("username", username.value)
后端跨域传输时,cookie传递不过去 在配置项改为https,将secure标志改为false,用自签名代理对接,axois使用时也要设置对应的携带cookie参数。
1 2 3 4 5 6 7 8 9 10 11 12 13 14 15 16 server: {
el-card长度调整问题 有时候100%不生效,要用100px。
el组件的格式修饰问题 用::v-deep才能深度修饰
1 2 3 4 ::v-deep .upload-demo .el-upload-dragger {
el-upload自定义上的问题 用:http-request重定义上传逻辑,注:这里会自行传输一个 FormData类型的数据,ts中需要对它进行定义。(就算实际是https,也要用这个名字)
部分代码:
1 2 3 4 5 6 7 8 9 10 11 12 13 14 15 16 interface UploadFileParam {
el组件输入时,需要失去焦点才能输入一次信息的问题 el-form初始化时,参考教程使用了ref,可能是vue2与vue3对信息适配的不同,这里要改为reactive。
el组件上传完毕后清空上传列表 用ref对象接收,然后在upload组件上挂上,最后调用clearFiles方法清除。(注意,这里vscode会提示报错,实际可以运行并达到效果)
代码:
1 2 3 4 5 6 7 8 9 10 11 12 13 <el-upload
证书卡片吊销后视图不立刻更新 在调用吊销函数时,直接将存储这些信息的数组中删掉该对象,vue视图会重新渲染。
由于 certs 是响应式的,重新赋值 certs.value 会触发视图更新,导致 DOM 中移除已吊销证书的卡片。
1 certs.value = certs.value.filter(cert => cert.id !== cert_id)
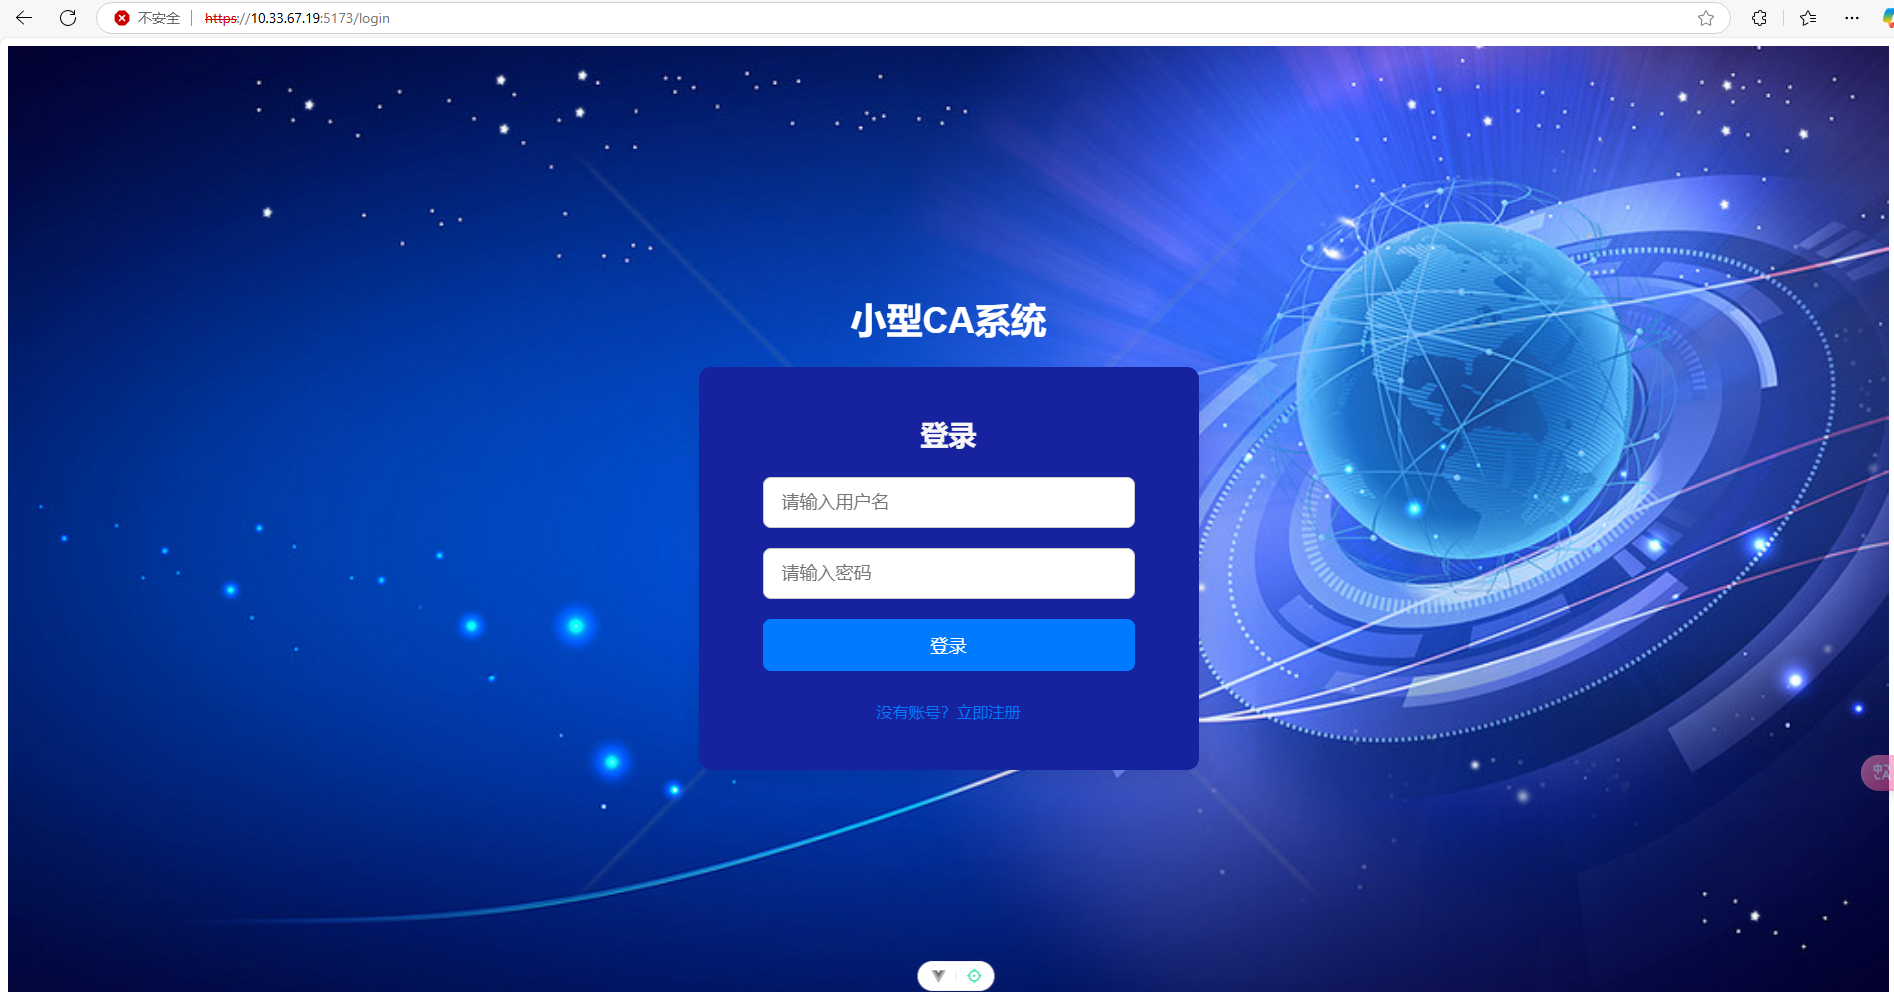
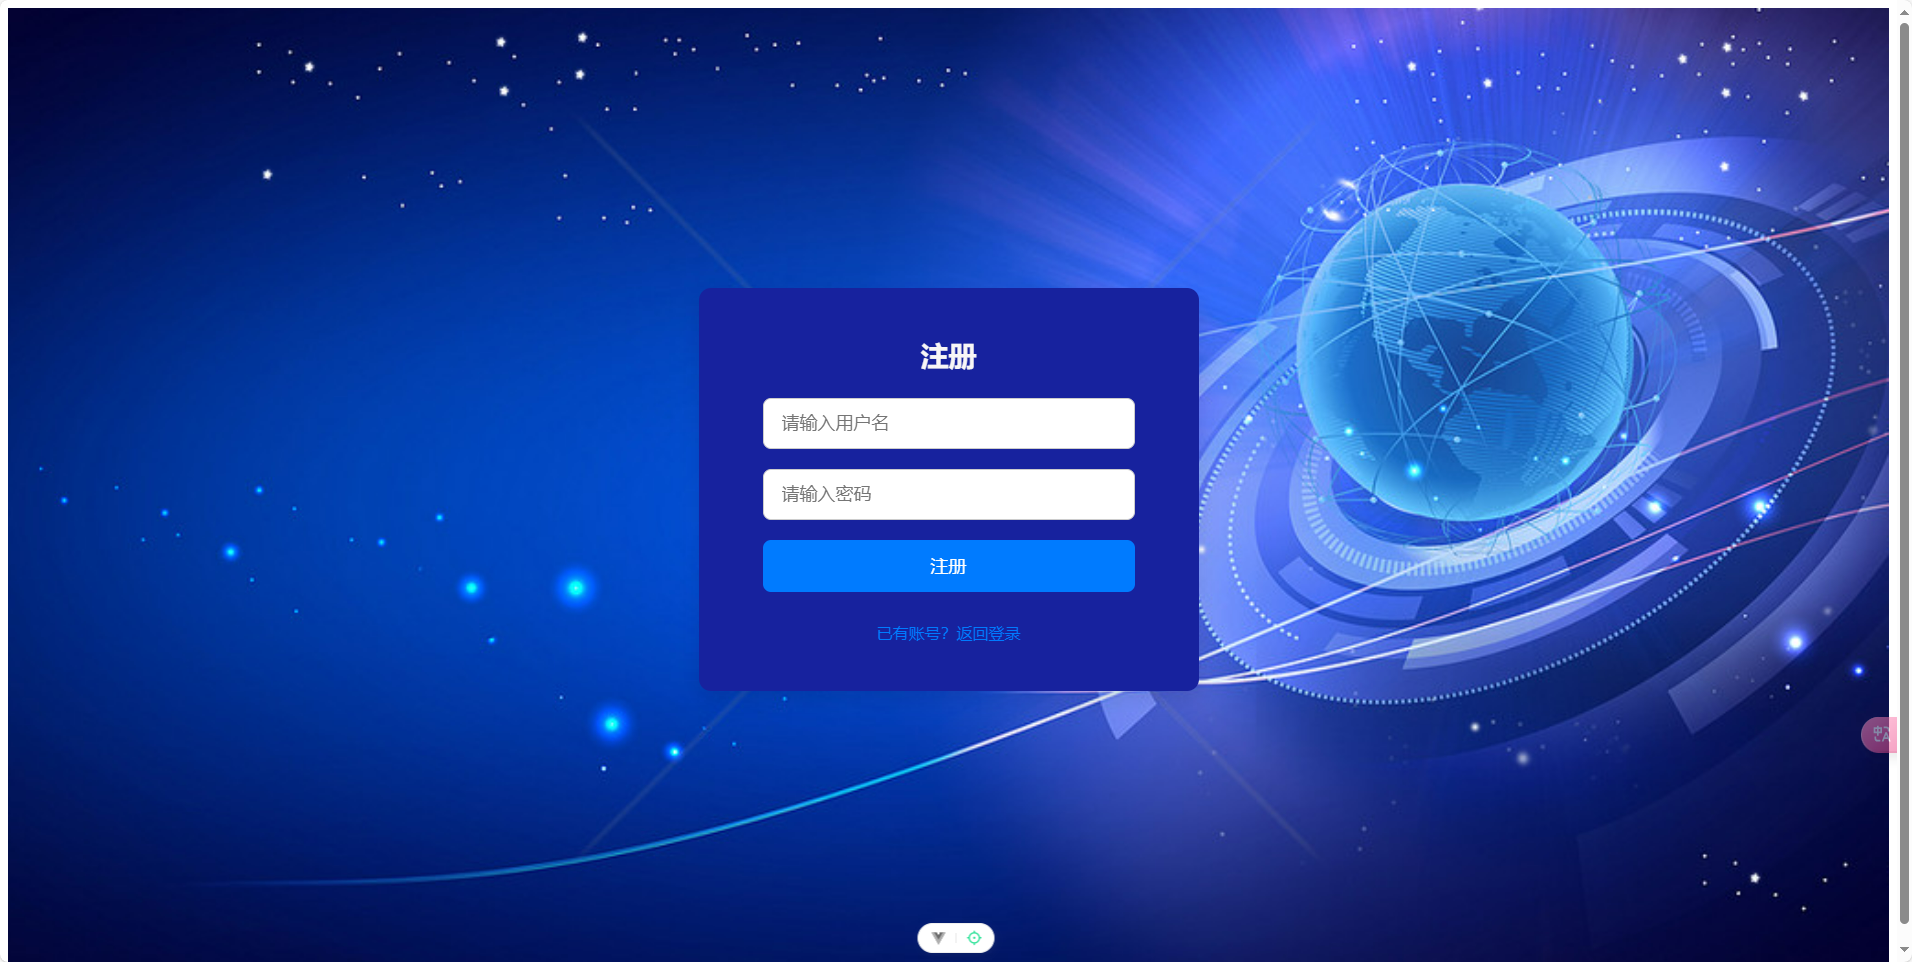
功能展示
登录
注册
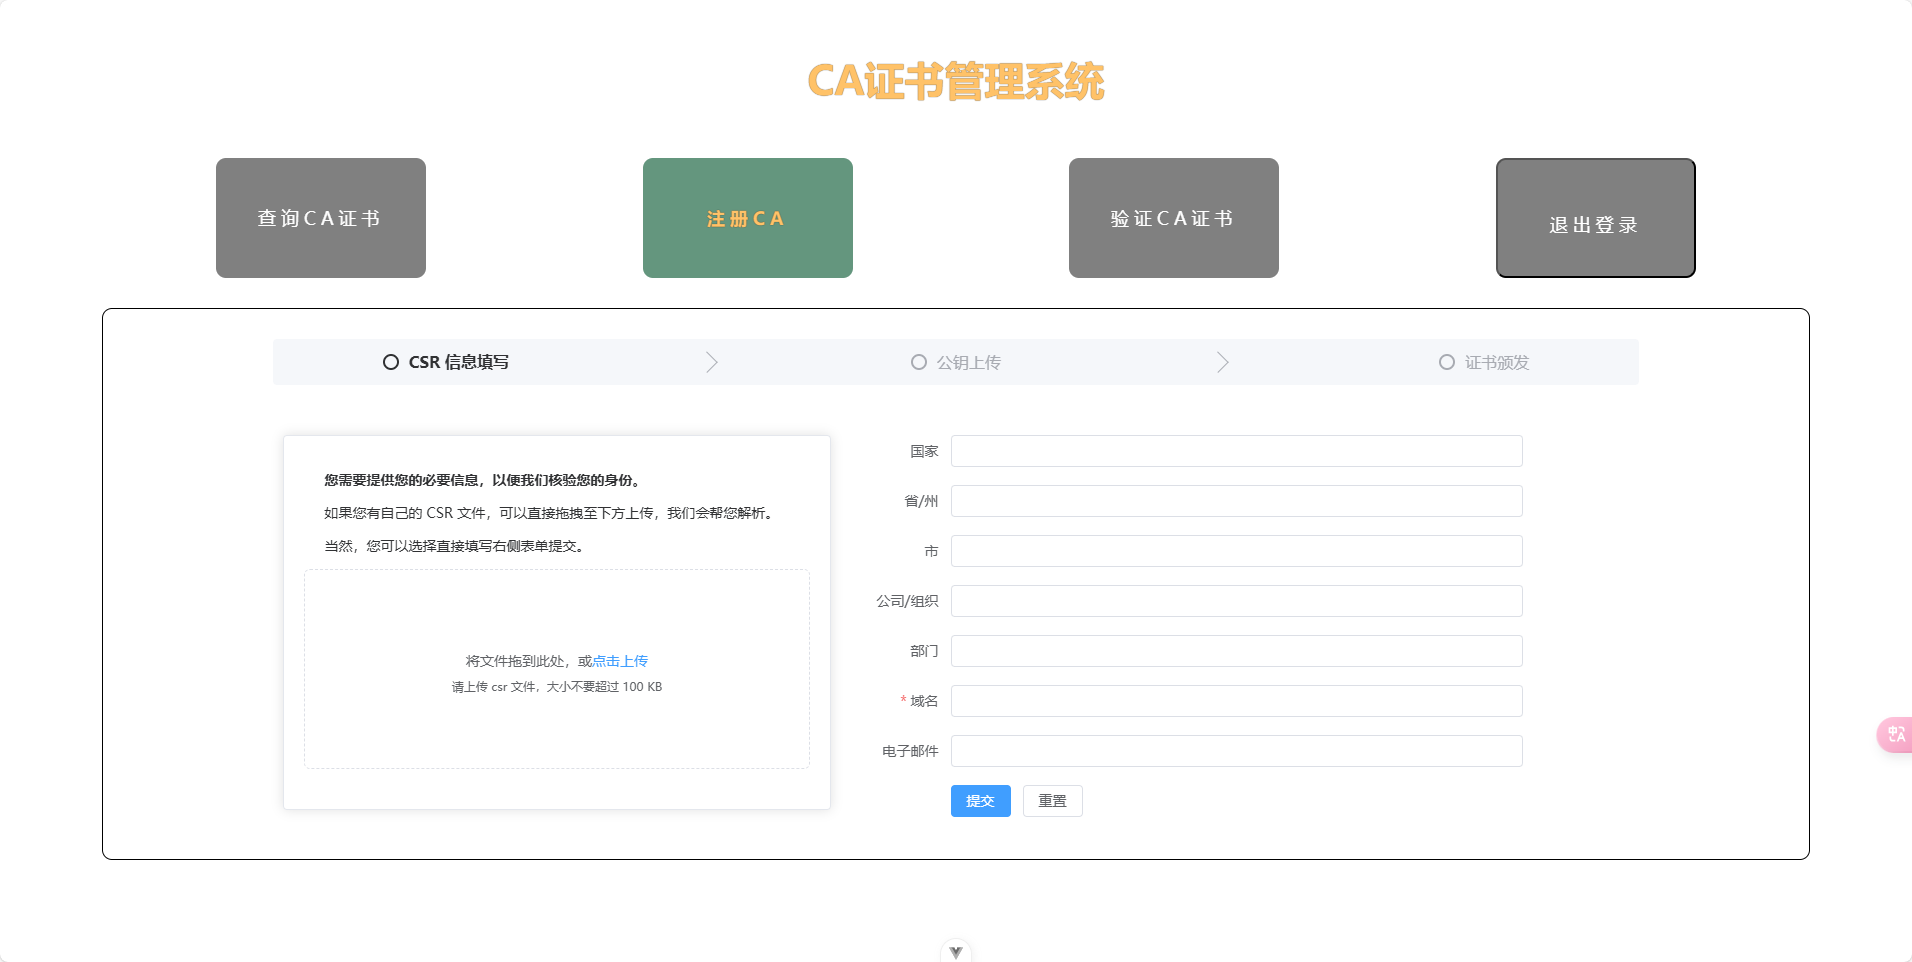
csr信息填写
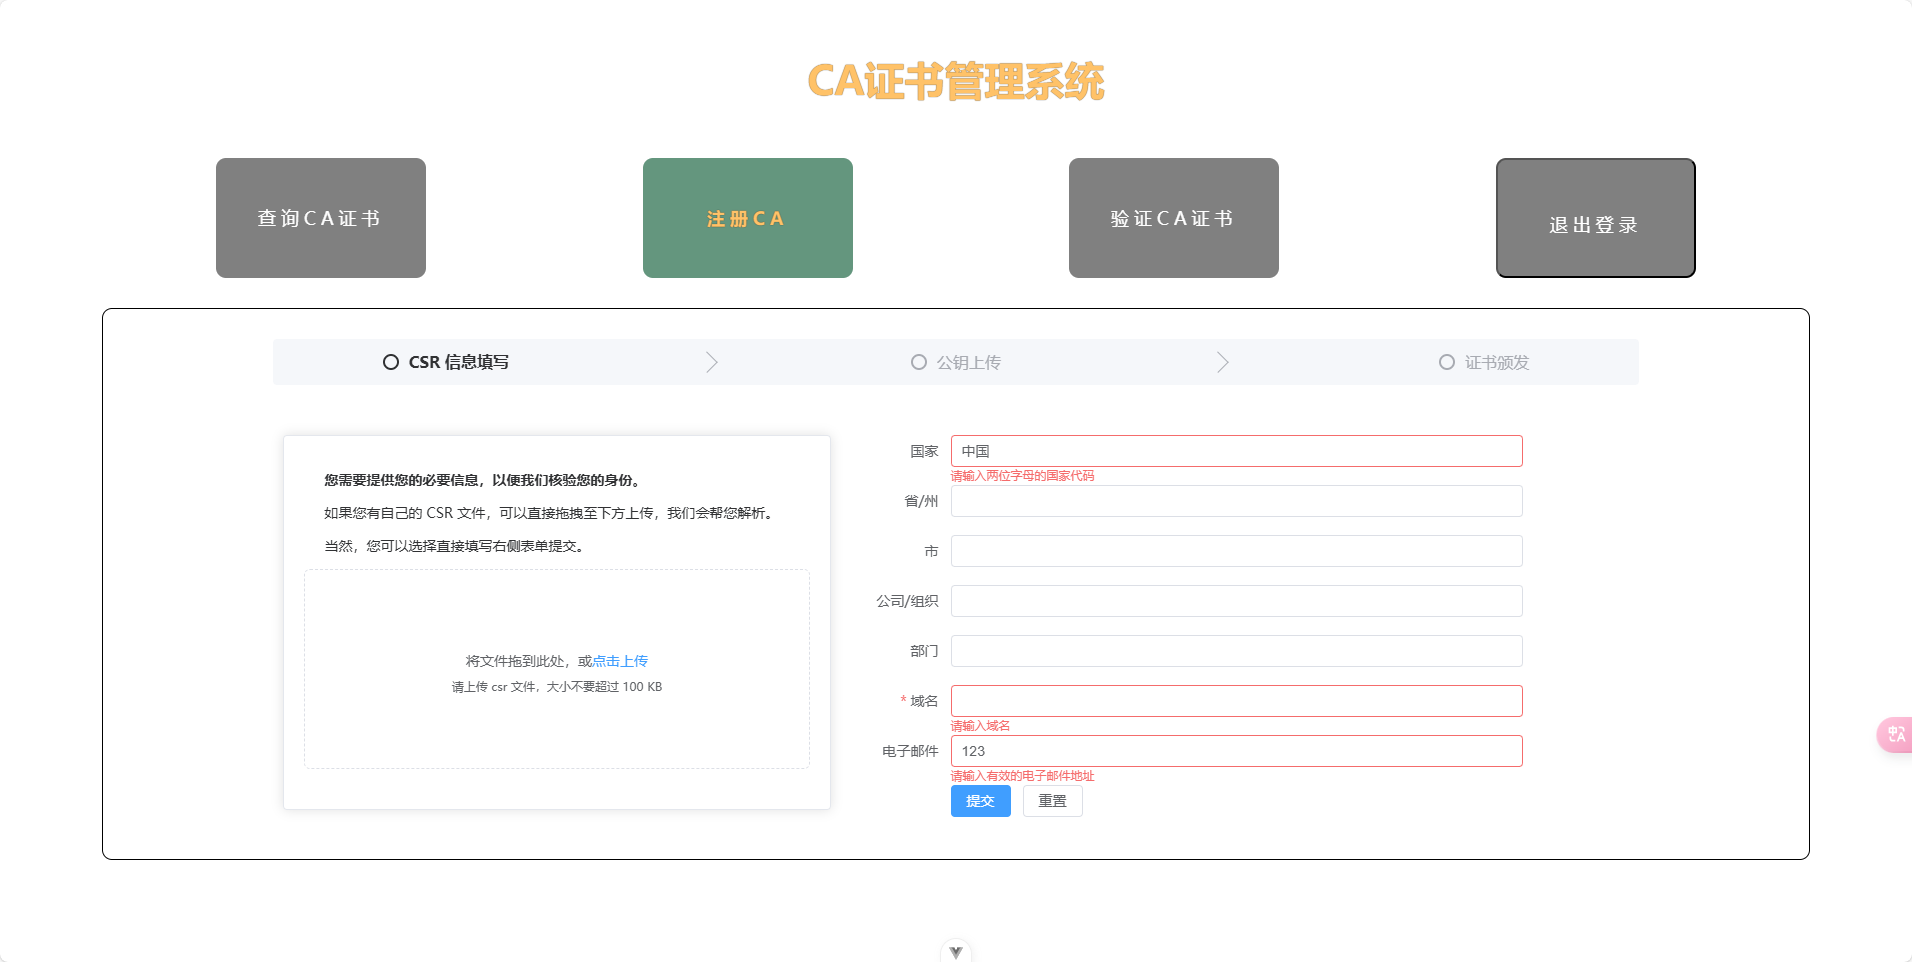
基础信息的填写,可以选择上传csr文件,也可以直接填写,只有域名是必填项,不填时会出现警告;国家要求两位英文字母,电子邮件要求是邮件格式,否则会有提示。
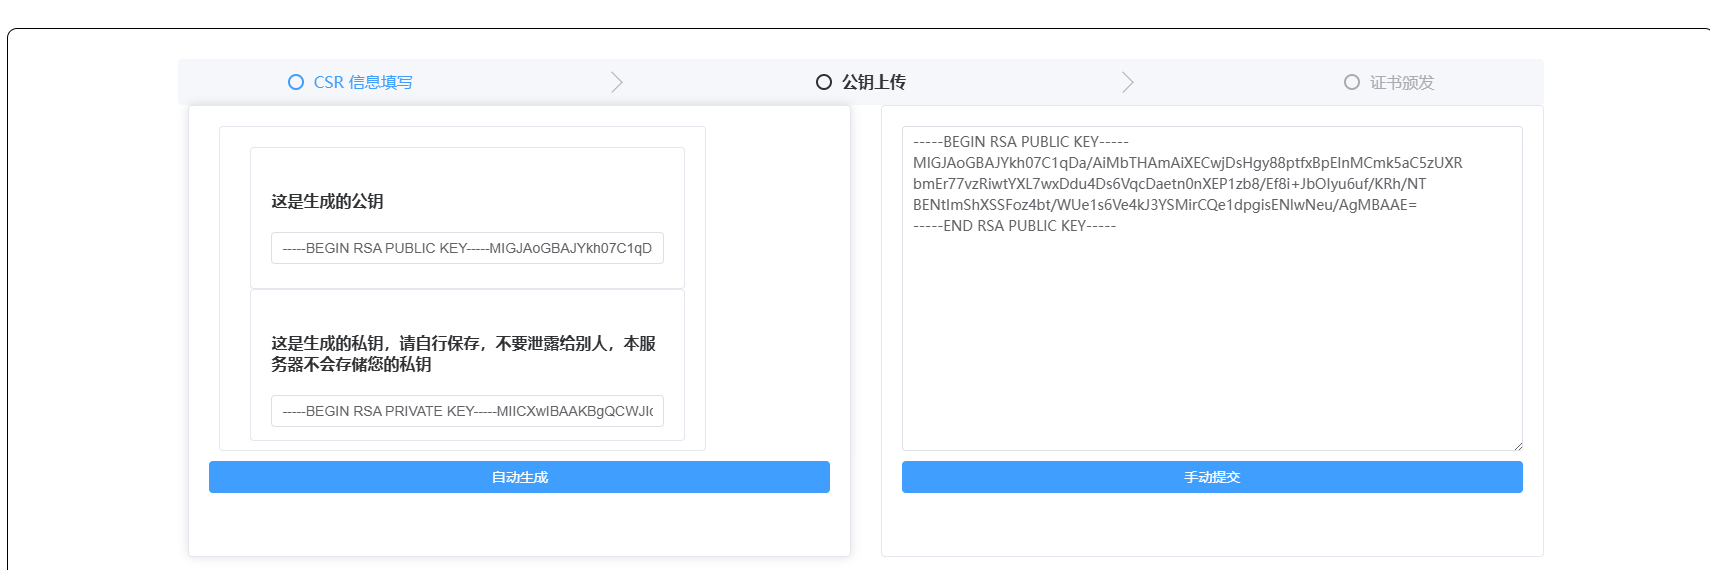
公钥上传,可以点击自动生成,右侧会自动显示生成的公钥,也可以将自己的公钥复制过去,点手动提交
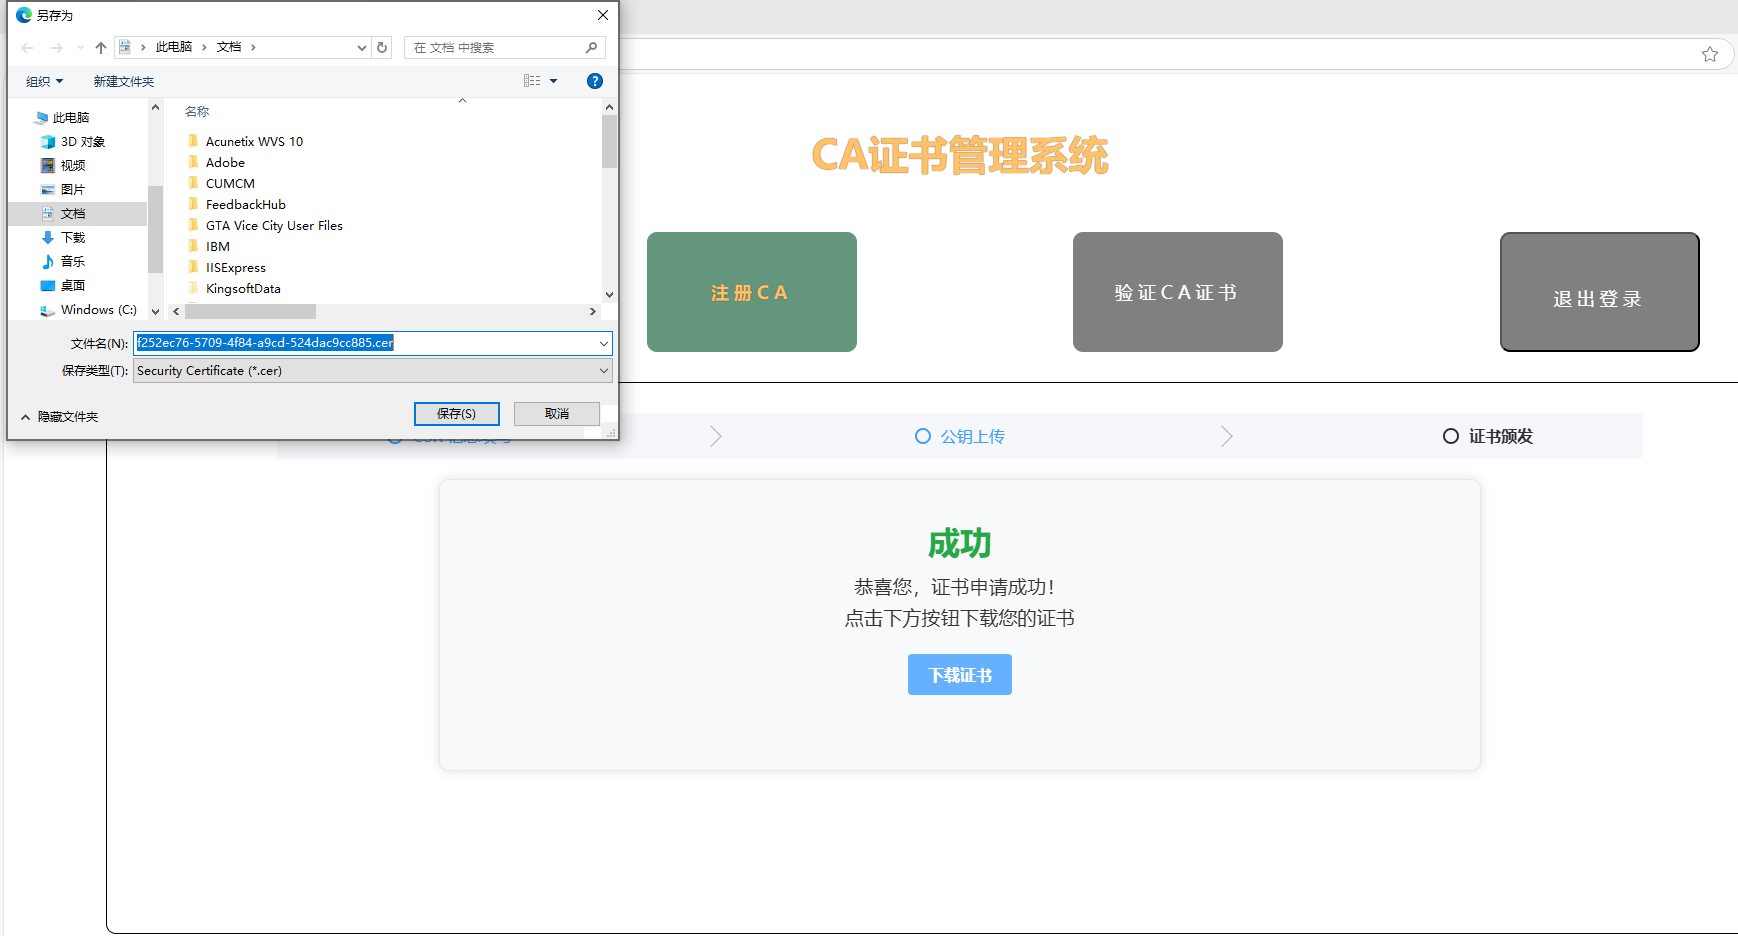
提交完成后,点击下载证书,可以直接下载文件
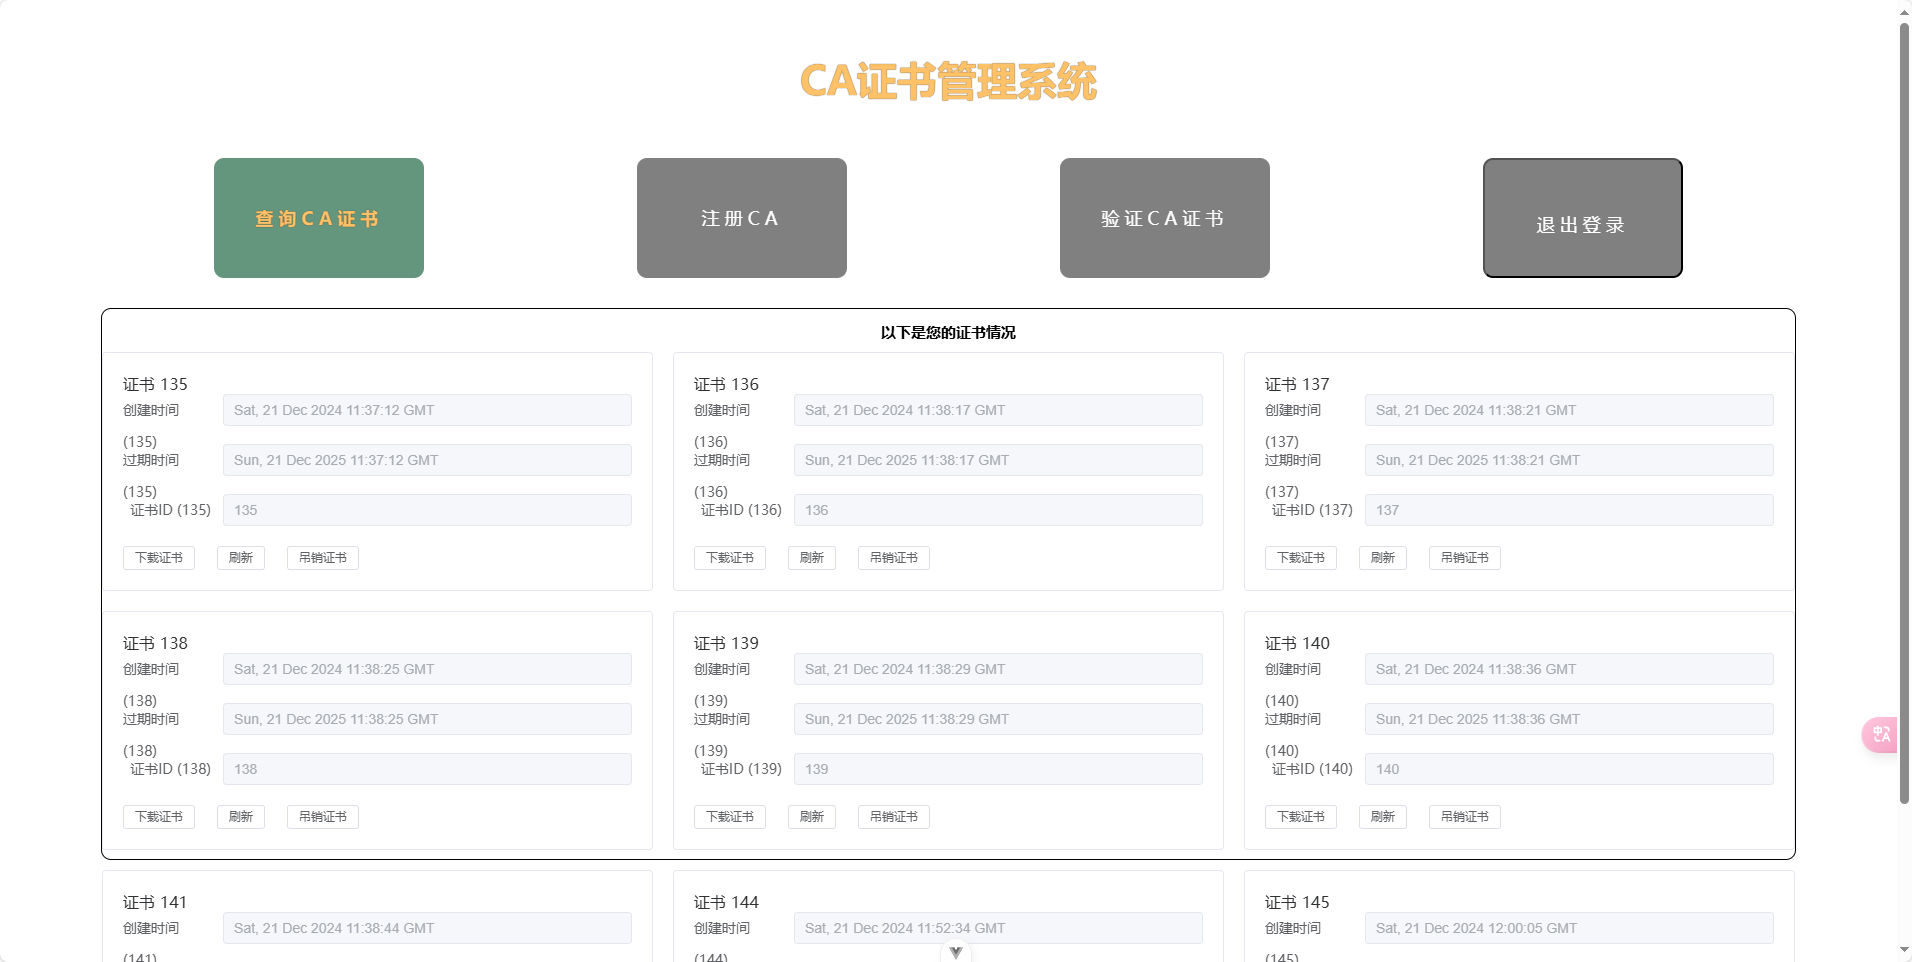
查询CA证书,查询自己所有生效的CA,可以选择下载,也可以点击吊销使证书失效。
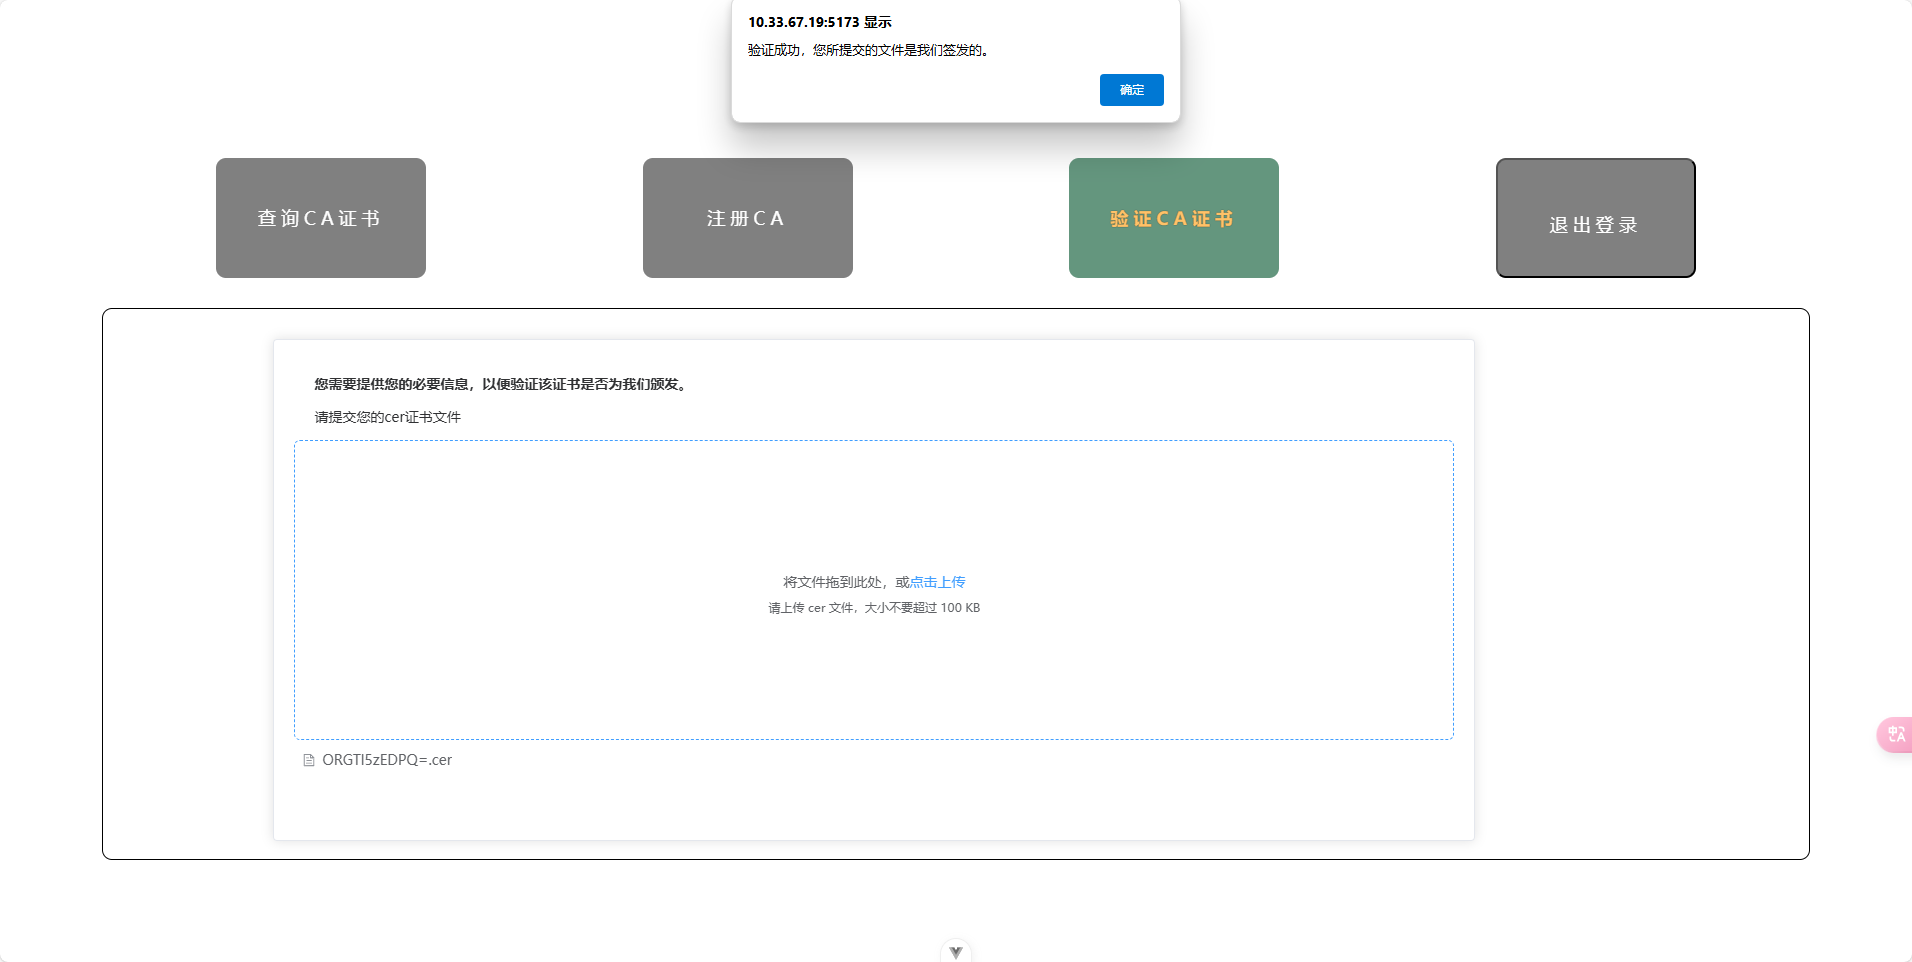
验证CA证书,将文件上传后,会弹出提示消息
退出登录 :点击退出登录后直接退出
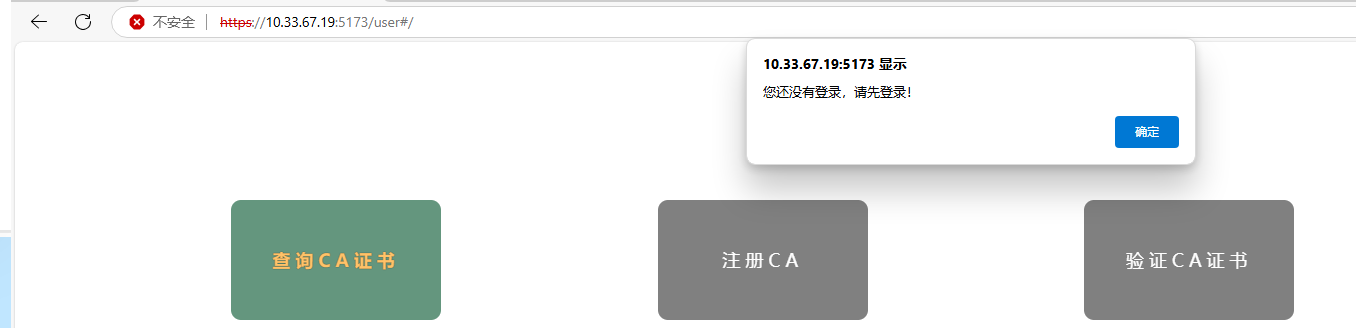
前端有本地会话验证用户信息,后端有session验证信息,二者分离验证,保证只有登录的用户才能正常使用,如果直接通过页面跳转进来,会弹出提示消息,点击后返回到登录页面